Part 1 of AWS EC2 for Beginners: Creating An Instance To Host A Customized Website
Part 1 of AWS EC2 for Beginners: Creating An Instance To Host A Customized Website
And we are back this week with another tutorial, and this time we're diving into AWS EC2! Amazon Elastic Compute Cloud (Amazon EC2) provides scalable computing capacity in the Amazon Web Services (AWS) Cloud, eliminating the need to invest in hardware. Simply put, you can leverage AWS EC2 to set up your very own Linux instance (virtual computing environments/servers), can be used to serve as your own virtual network, and you can secure EC2 such as by using key pairs and/or security groups, to name a few. Now that you have a high-level overview of AWS EC2, let's get into the tutorial of launching an AWS EC2 instance, and using BASH scripts to create new users and a customized website!< /p>
Resources/PreReqs:
- As always, Confidence to get it done!
- An AWS Account: Sign Up Here (Select the FREE Tier ccount)
- Nano or Vim (Text Editors)
- Basic understanding of Linux command input/output
- MacOS Terminal, Windows Command Prompt, or Linux Shell
- GitHub Account: Sign up here (Stay logged in!)
And we're off!
Basic Project Execution
Step 1: You should be logged into your AWS Console at this point, so we will begin with the first set of steps.
- In the top left corner of the console, click on "Services", and select "EC2"

- You'll then click on "Launch Instance", which will take you to the following page:
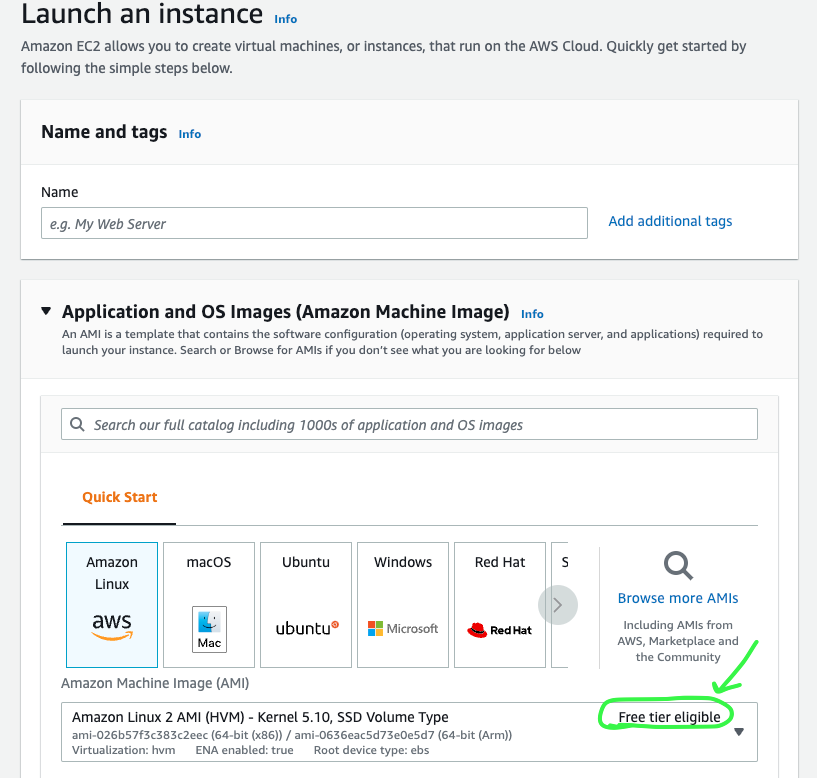
- After naming the instance, be sure to select an OS Image that has "Free Tier" next to it, followed by "t2.mirco" as the instance type (also free)
- While some may say this is optional, I would recommend adding a key pair as this adds additional security. Once created, the key pair will download automatically to your device. See the output of how this should look:

- Next, we'll have to enable inbound traffic for the Apache Server (SSH and on HTTP for the IP of 0.0.0.0/0) from our IP, so scroll down to "Network Settings", and your options should look like this:

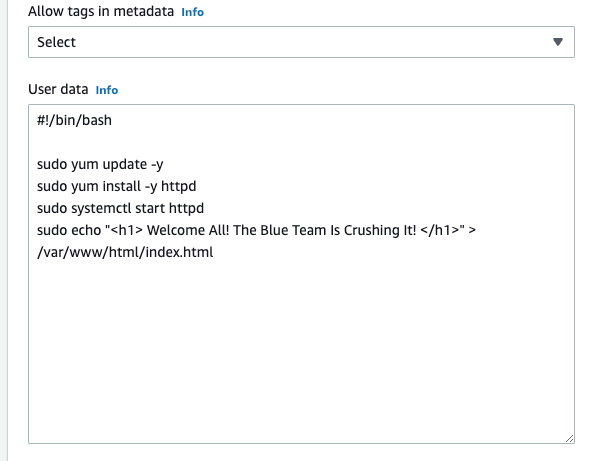
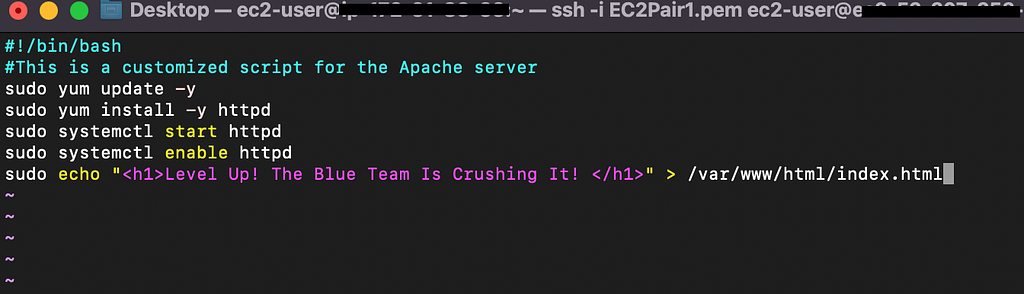
- Now that we have enabled the traffic to the instance, we now have to add our BASH script in the "User data" field, under advanced settings, or we can use Vim later on to create a script as well. I will show both options. If you're unfamiliar with BASH scripting, refer to this blog and take a look at a previous script that I created. This is how the script should look:
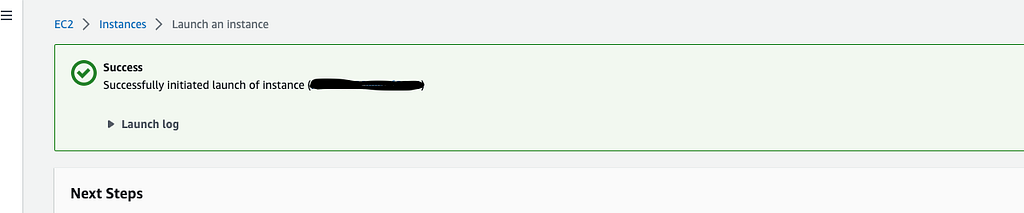
- And now, let's move forward with Launching our instance, so click on "Launch Instance":
Step 2
We will now view all instances to ensure the instance state is set at "Running" and the "Status Check" shows everything has passed.
- Since everything looks good with the instance, let's proceed with clicking on "Connect", and then clicking on it once more on the next page:

- If the above option does not work for you, you'll have to try to ssh directly into the instance, using the commands below:
chmod 400 <YourKeyPair.pem>
ssh -i <YourPemFileName> <InstanceUserName>@instancepublicdnsname
**Install the AWS CLI and and SSH Client if necessary to execute the command
- Now, after running the command above, the output should be successful, which means you will now be able to connect to your Instance:

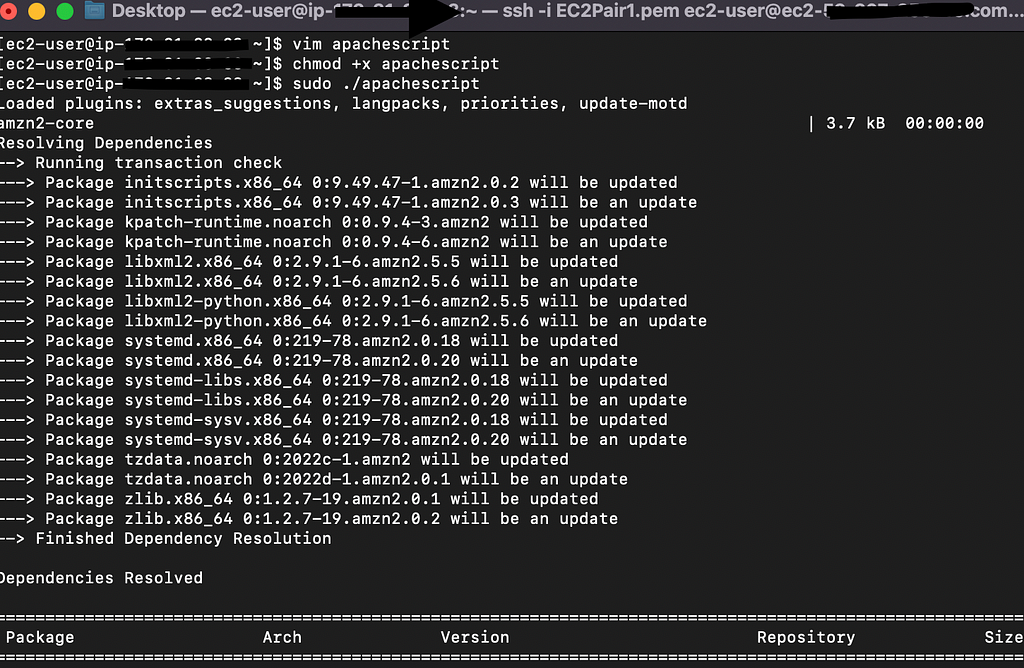
- You can use the vim text editor to create your script as mentioned earlier, by typing vim <yourscriptname>.sh (Remember to hit the "i" key to start adding text, and :wq to save the script)
- To be sure that the script runs properly, type the following:
chmod +x <yourscriptname>.sh, followed by sudo ./<yourscriptname>.sh
**You should notice that it is being executed after typing those commands
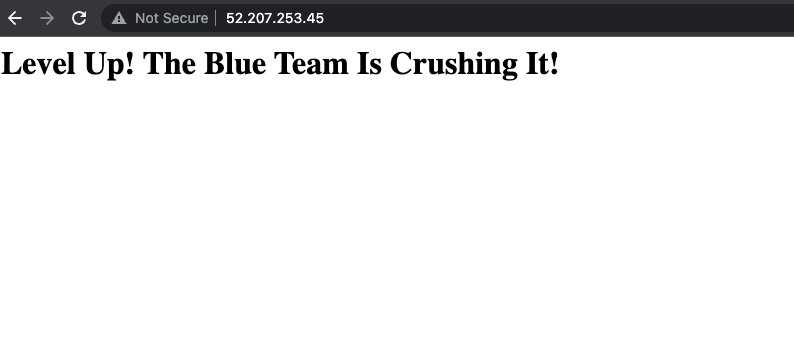
- Now, go back into your AWS Console and either refresh the instance and try to re-connect followin g the "Connect" option above, or simply copy and paste the IPv4 address and paste it in your browser, and it should look like this:
*Be sure to STOP your instance for the time being. You will be able to re-start the instance in Part 2 of this tutorial.*

Now that we've completed Part 1, sit tight because Part 2 is coming up next!
Part 1 of AWS EC2 for Beginners: Creating An Instance To Host A Customized Website was originally published in Towards AWS on Medium, where people are continuing the conversation by highlighting and responding to this story.
Comments
Post a Comment