Top Devops news and How-To articles from Best players in IT industry.
DynamoDBÂ , EC2 and IAM
Get link
Facebook
X
Pinterest
Email
Other Apps
DynamoDB , EC2 and IAM
DynamoDB is a hosted NoSQL database service that offers reliable performance even as it scales. It allows users the benefit of auto-scaling, in-memory caching, backup and restore options for all their internet-scale applications. Per our project, we will be creating a DynamoDB table with items, creating an EC2 instance and granting it read-access to the table, scanning the table through the AWS CLI, and validating that we can't write an item to the table through the CLI. Let's get started!
Project Requirements:
Create a DynamoDB table
Add 10+ items to the table
Create a t.2micro EC2 instance
Using an IAM role and the principle of least privilege, grant the EC2 instance read-access to DynamoDB
Use the AWS CLI in the EC2 instance to scan the DynamoDB table
Use the AWS CLI in the EC2 instance to validate you cannot write an item to the DynamoDB table
Prerequisites:
AWS Account
AWS CLI
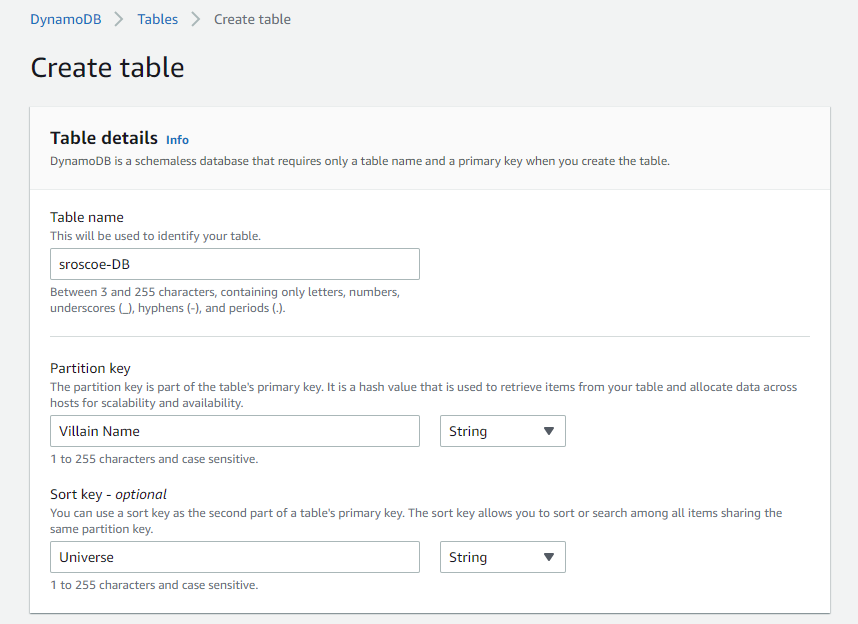
For starters let's type DynamoDB into our search bar in the AWS Management Console and click on the service. Click on Create Table, and afterwards, follow the steps below:
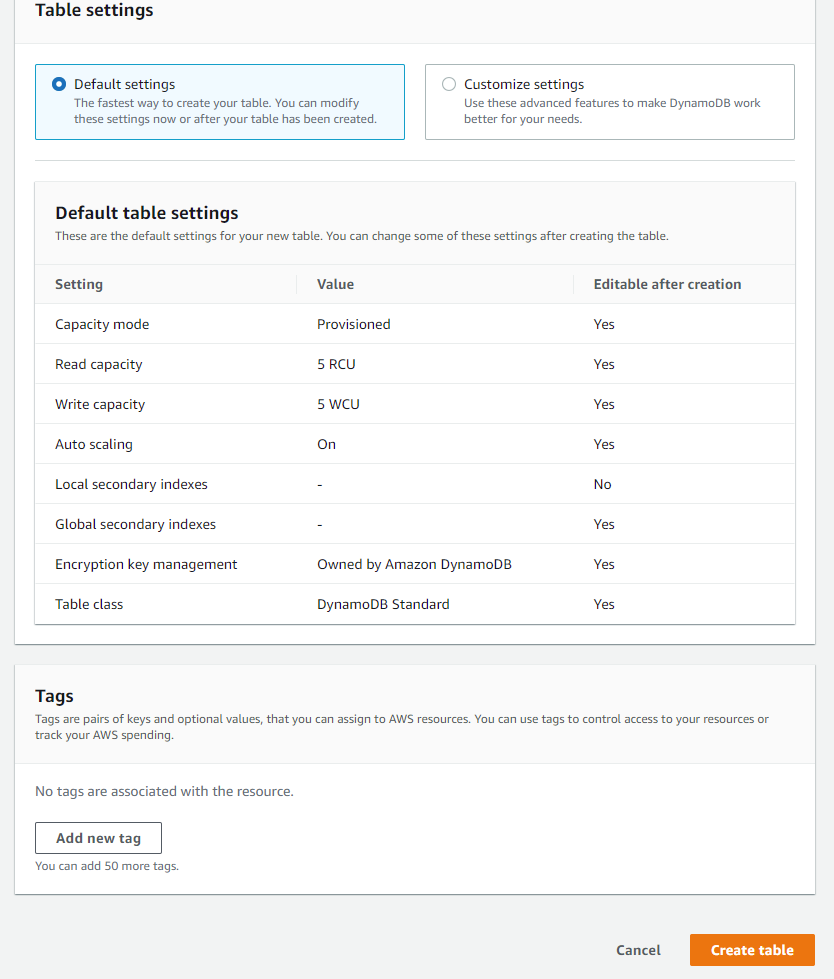
Step 1: Fill in your information. A partition key is a simple primary key that holds a unique attr ibute, something that the other partitions within the table do not have. A sort key is a key that can gather related information together in one place where it can be queried efficiently. A composite key is a combination of a partition and sort key, and we will be using both in this project.For this project, we will leave the settings how they are and create our table.
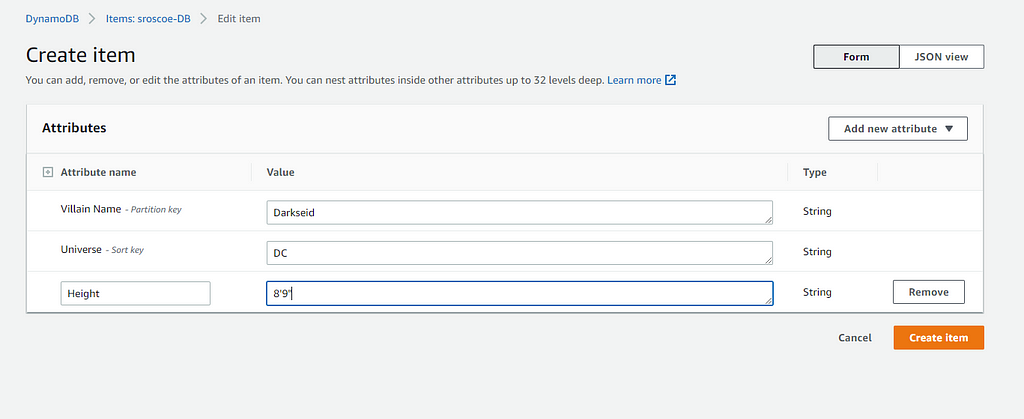
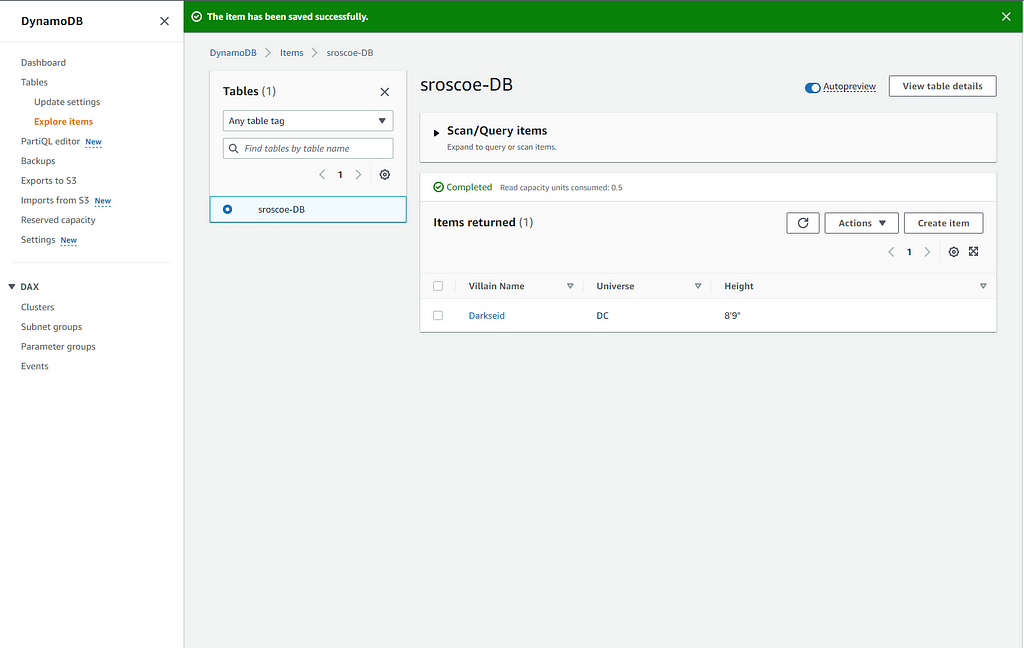
After your table is done creating itself, click on it and click on Explore Items > Create Item:
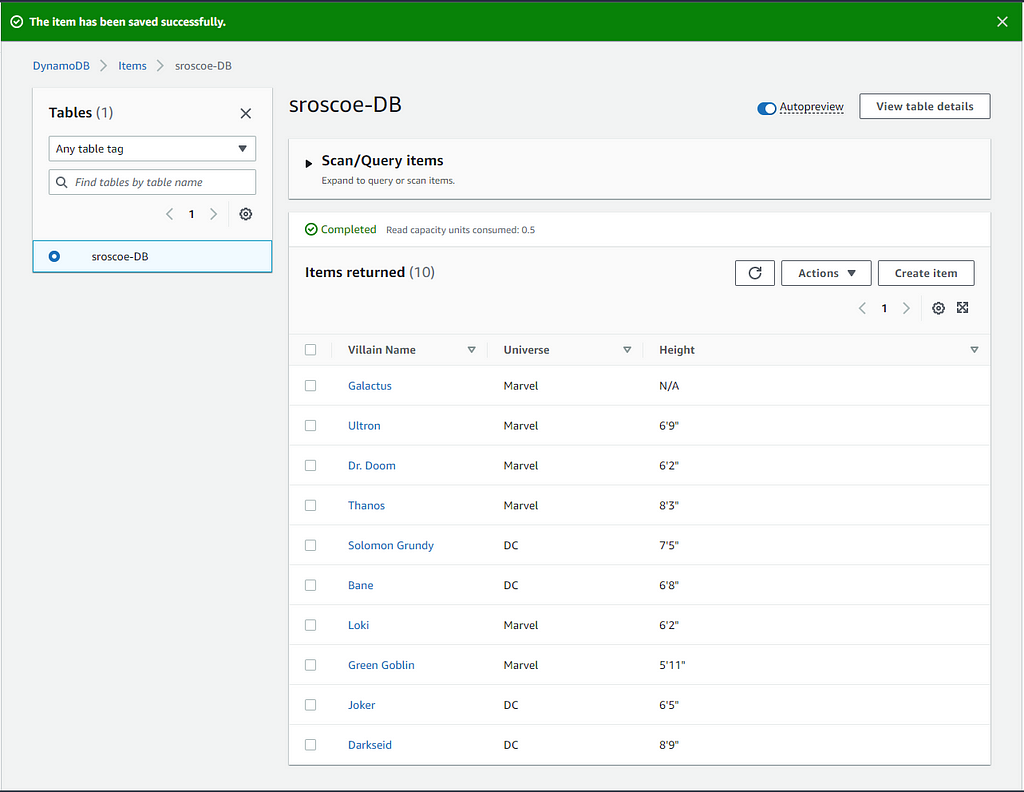
I clicked on Add New Attribute to add another String attribute for more efficient querying. I named the String attribute "Height". Afterwards click C reate ItemAs you can see, the item was created. Per our project, we must create ten or more items. Click Create Item and continue
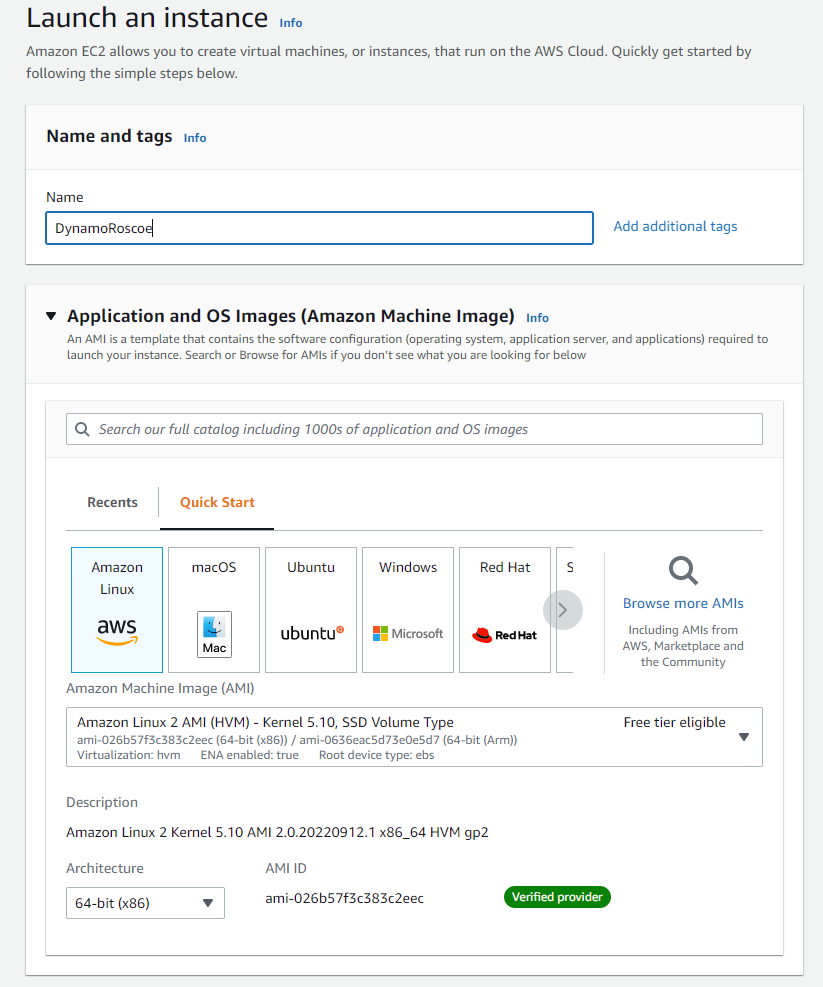
Now that our table has been created, let's head over and create our EC2 instance.
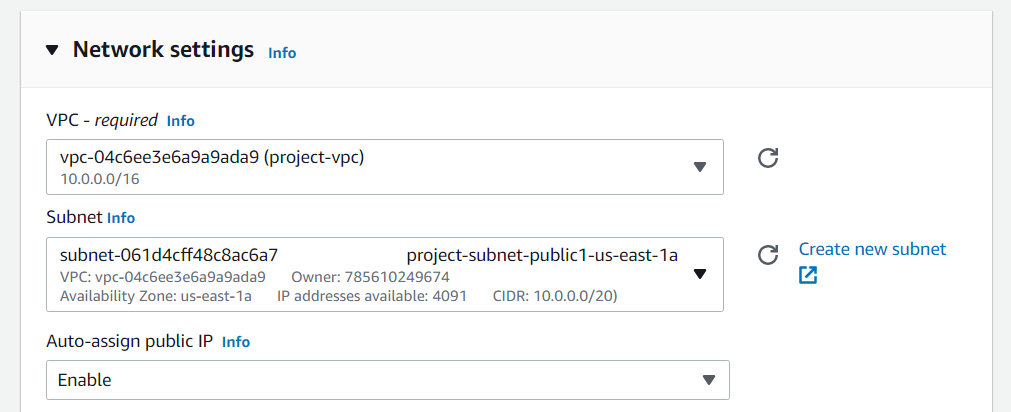
I decided first to create a separate VPC for this project. Check out my article here on how I did that. Next, I went ahead and created my instance:
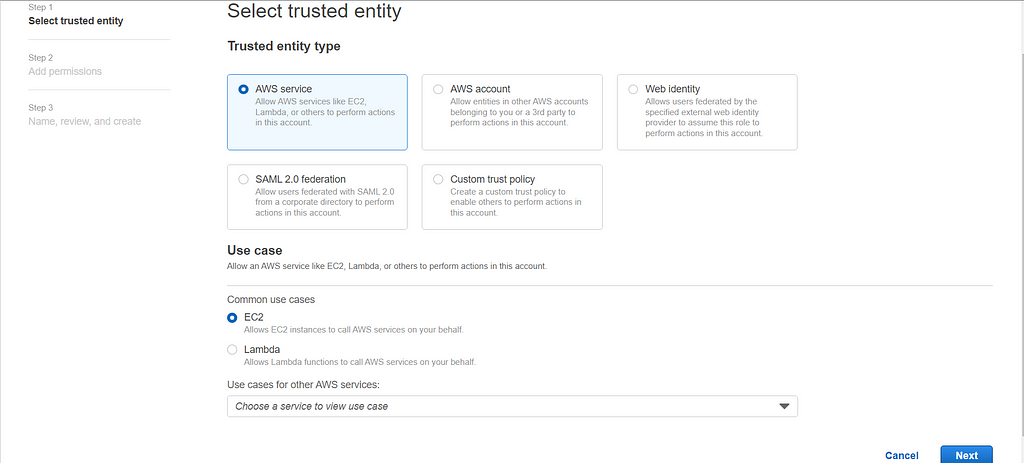
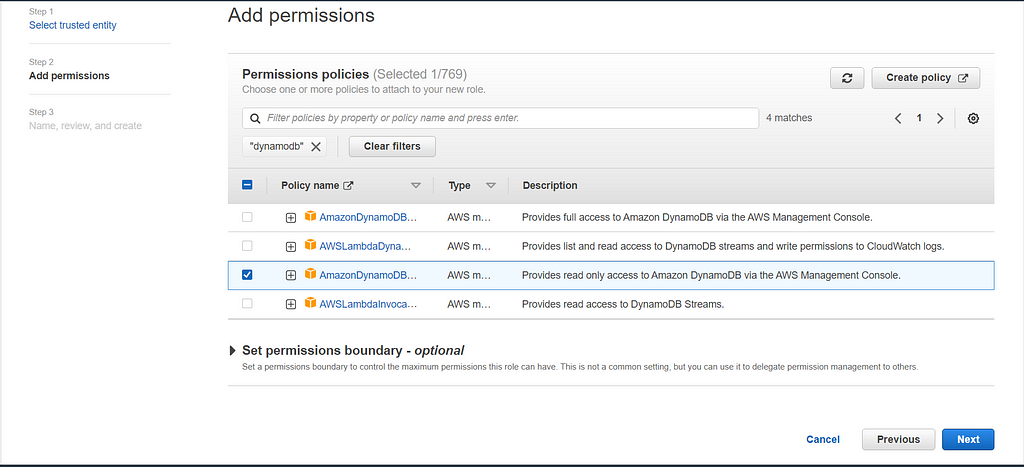
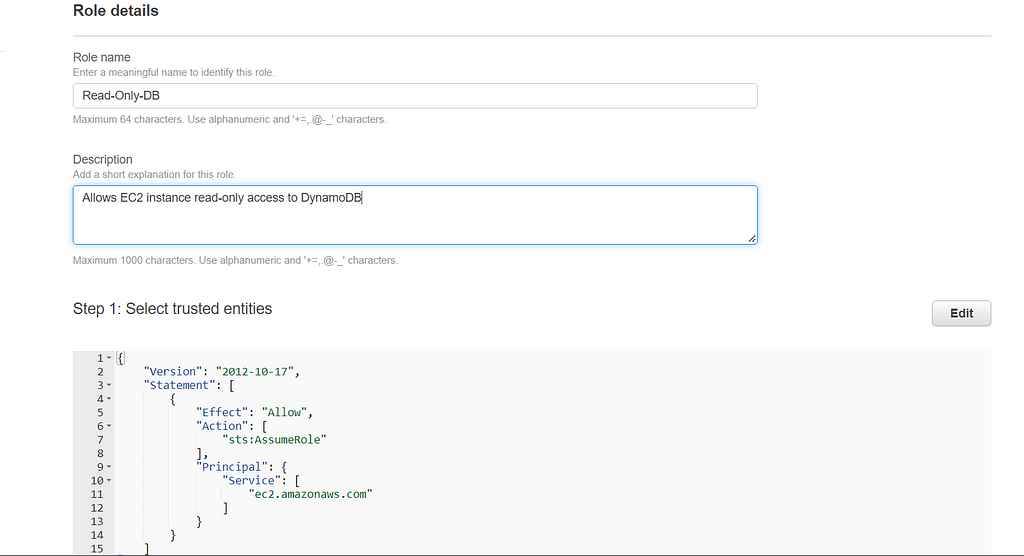
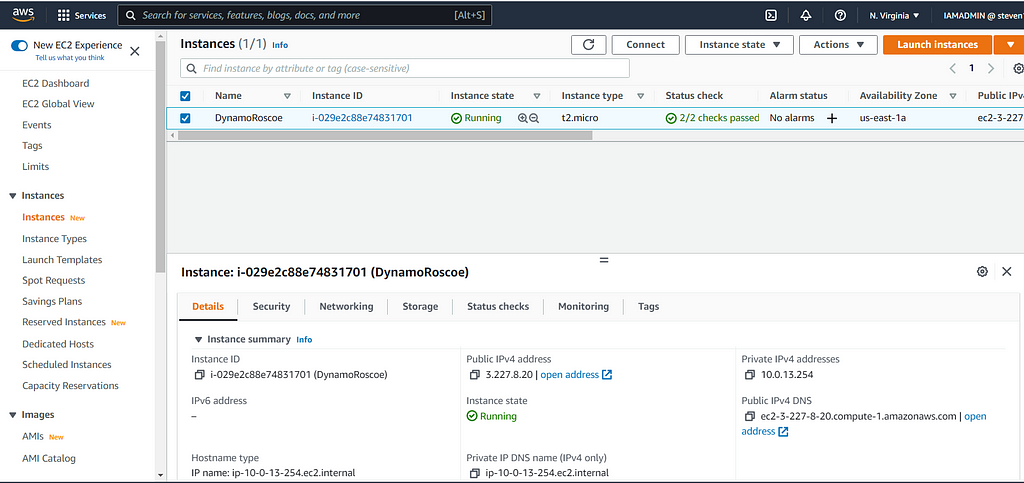
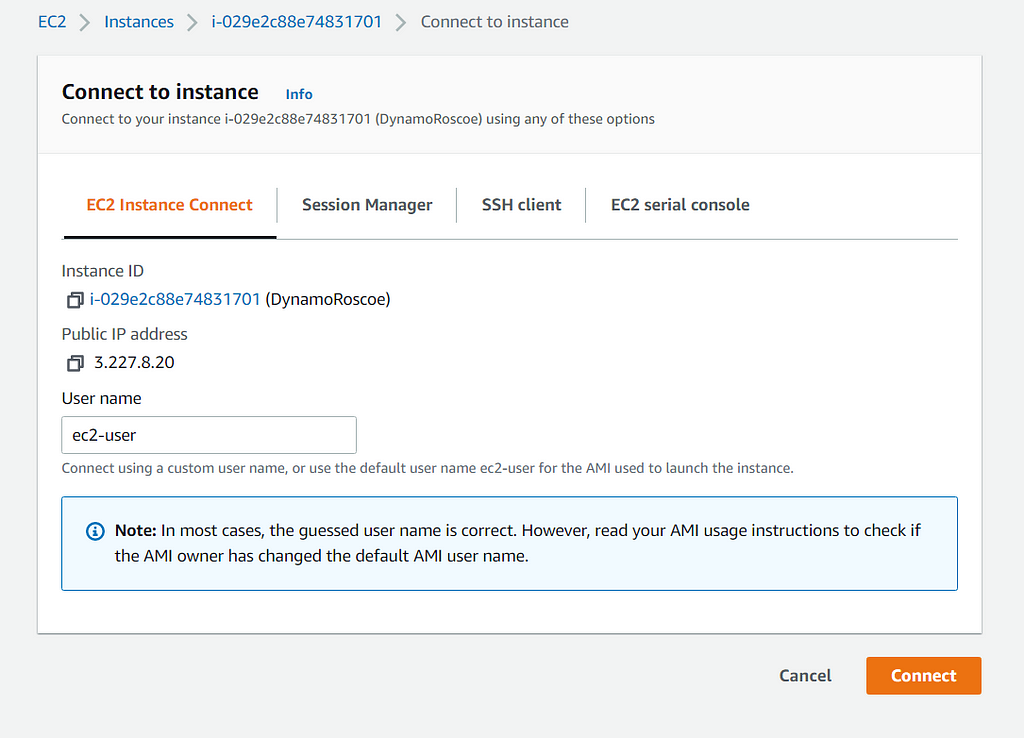
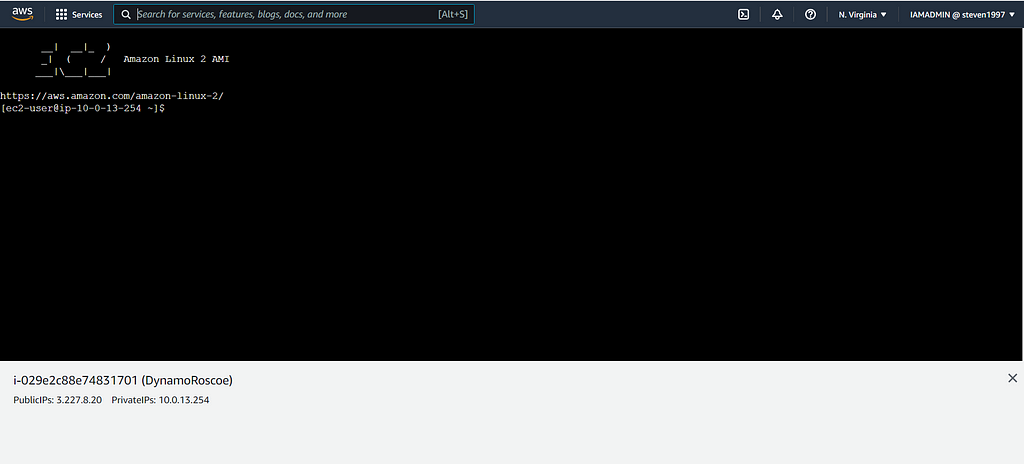
Named the instance and chose the Amazon Linux Machine ImageSelect our t2.micro type and create a key pair just for good measureChoose the VPC and subnet that we created before. Our subnet will be in the Availability Zone us-east-1aCreate a security group and have SSH set up to allow all traffic just for this projectIn the Advanced Details section, click on Create new IAM profile. This will take us to a tab where we will create a new role for our EC2 instance to have read-only access to our DynamoDB tableClick on Create RoleKeep the Trusted Entity Type as AWS Service, and select EC2 as your use case. Click nextSelect the DynamoDB read-only access permission for your EC2 instance. Click nextOur role details look good, now let's click Create Role, at the bottomAfter the role is created, let's go back to the previous tab and select the "Read-Only-DB" role that we created for our IAM profile. After that, launch the instanceNow that our instance is done initializing, click on Connect at the top of the pageFor this project, we'll be using EC2 Instance Connect which allows us to use the AWS CLI inside the Management Console. Click Connect. This should open up the CLI in another browser tabAWS CLI inside the AWS Management Console
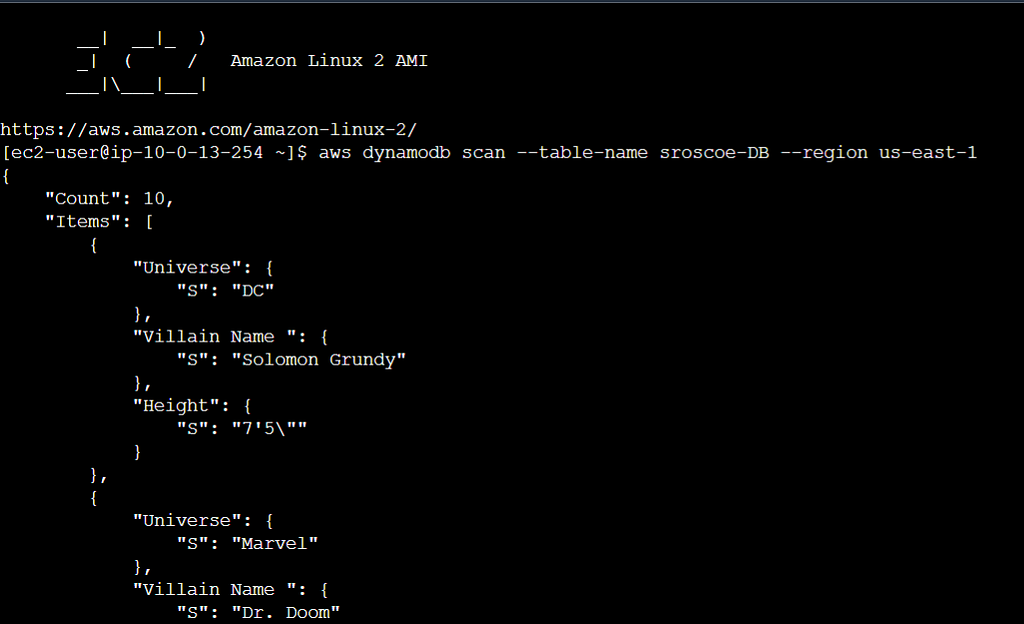
We will now input the following command into our console to scan the table:
aws dynamodb scan --table-nam e sroscoe-DB --region us-east-1
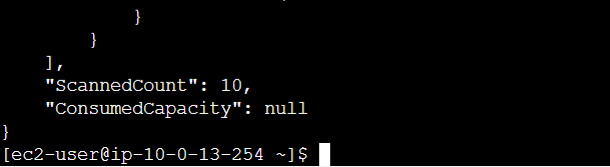
The command was able to scan all 10 items
Now to test that we only have the read-only access permission for DynamoDB, let's input the following command:
The AccessDeniedException output shows we only have read-only permissions
Had fun with this project, and this concludes month two of AWS. All feedback is welcome, and thank you for stopping by!
DynamoDB , EC2 and IAM was originally published in Towards AWS on Medium, where people are continuing the conversation by highlighting and responding to this story.
Namaste Devops is a one stop solution view, read and learn Devops Articles selected from worlds Top Devops content publishers inclusing AWS, Azure and others. All the credit/appreciations/issues apart from the Clean UI and faster loading time goes to original author.
Get link
Facebook
X
Pinterest
Email
Other Apps
Comments
Did you find the article or blog useful? Please share this among your dev friends or network.
An android app or website on your mind?
We build blazing fast Rest APIs and web-apps and love to discuss and develop on great product ideas over a Google meet call. Let's connect for a free consultation or project development.
Happy to show you all my latest project in python. ** EC2 Random Name Generato r** This python project is about generating a unique name for the "x" number of EC2 instances for a department and generating random characters and numbers that will be included in the unique name. This is especially important when in an organization, there are so many users, departments sharing an AWS environment. This ensures that they are properly named and are unique so any team member can easily tell to which department he/she belongs to. The ONLY departments that should use this Name Generator are Marketing, Accounting and FinOps. The user then lists these departments as options and if a user puts another department, the program will print a message that they should not use this Name Generator and the program should exi t. Also it checks whether an input has an incorrect upper or lowercase letters for the corresponding department. This program also checks for any negative number input for ...
Trying to reduce your spend seems to be easy, starting by : Shutting down your resources when you don't use it Deleting your unused resources Control who can enable new resources But sometimes it's not enough ! Try to check what are the most used services by looking at your billing export : There is 2 very interesting services in this list : Cloud Run Cloud SQL What can we do for these two ? Committed use discounts (CUDs) for Cloud Run is a 17% discounted pricing in exchange of a continuously use in a particular region for a one year term minimum (up to 3 years max). You commit is in dollars per hour of equivalent on-demand spend. In exchange, you receive a discounted rate on the applicable usage your commitment covers. It's only counting for one specific choosed Google location Any overage is charged at the on-demand rate. You still receive the same discount percentage on applicable usage in the event of a price change. The commitment fee is billed monthly. It's a...
Approach 1-Integrating Gitlab repository with Cloud Build Triggers via webhook | CI/CD pipelines with GKE Hello everyone 👋, In this blog we will build the code from Gitlab repository and deploy our code to Google Kubernetes Engine by integrating it with Cloud Build. Photo by Nicolas Gonzalez on Unsplash As we can see Cloud Build Triggers doesn't give direct option to build our code from Gitlab repository . Only Github, Bitbucket and Google Source Repository are available. So for selecting Gitlab as a source repository , we have 2 approaches. Approach 1 — In order to build our code with Gitlab, we need to introduce Gitlab webhooks to build our code and to automate our builds in response to webhook events. Approach 2 — ( Best Practise ). By creating Mirroring of Repository between Gitlab and Google Cloud Source Repository to use advanced features with our builds that CSR(Cloud Source Repository) provides . In this method we will first mirror the Gitlab repository, then we w...
Hey everyone, I hope you all are doing well. You might have read my previous article on Anthos Service Mesh. In this article, I wanted to give you an overview of Anthos Config Management. For a career in tech, subscribe to The Cloud Pilot Anthos Config Management Overview Anthos Config Management is a configuration and policy management service that enables continuous protection and configuration of Google Cloud. It consists of three components: Policy Controller, Config Sync, and Config Controller Benefits Many benefits come along with Anthos Config Management since it automatically synchronize s configurations and applies policies across multiple clusters. Some of them are: Simplified Management Consistent configurations and policy management Scalability across environments Security and Compliance Components As mentioned earlier, 3 components work together as a single service called Anthos Config Management. They are: Policy Controller Policy Controller enables the enforcement of...
Organizations that embrace multi-cloud services experience real results and a heap of advantages—including greater resiliency, agility and data sovereignty. This is why it's no surprise the majority of enterprises today are using two or more public clouds, with 81% reporting in a recent survey that they plan to adopt a multi-cloud strategy by 2024. But […] The post From Cloud Chaos to Cloud Smart With Multi-Cloud Services appeared first on DevOps.com . Namaste Devops is a one stop solution view, read and learn Devops Articles selected from worlds Top Devops content publishers inclusing AWS, Azure and others. All the credit/appreciations/issues apart from the Clean UI and faster loading time goes to original author .


Comments
Post a Comment