Designing 3-Tier Architecture in AWS
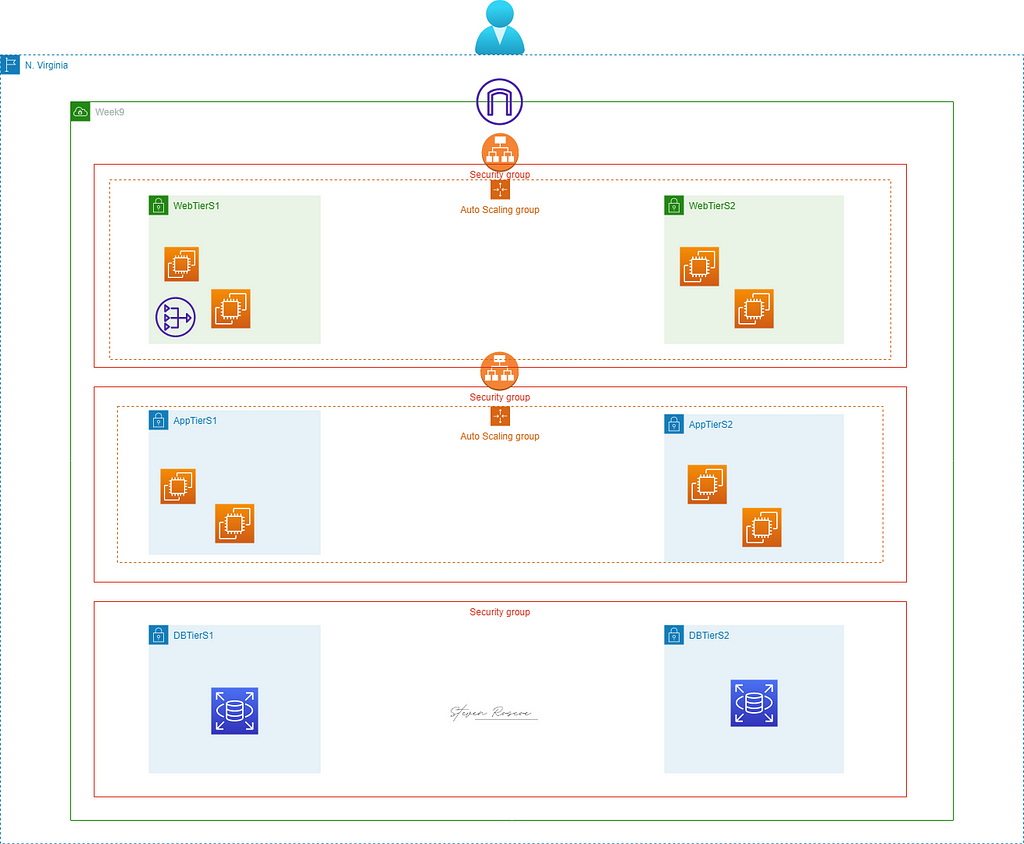
Three-tier architecture in AWS is defined as the most popular implementation of a multi-tier architecture and consists of a single presentation tier, logic tier, and data tier.
The benefits of a three-tier architecture includes:
- Improved data integrity
- Higher level of security
- Ability to update or scale one tier without impacting others
- Simultaneous development of all tiers for faster delivery
Objectives:
Web Tier
- Two public subnets associated with a public route table
- Minimum of 2 EC2 instances with an OS of your choice in an Auto Scaling Group
- EC2 Web Server Security Group allowing inbound permission from the internet
- Boot strap static web page
Application Tier
- Two private subnets associated w ith a private route table
- Minimum of 2 EC2 instances with an OS of your choice in an Auto Scaling Group
- EC2 Application Server Security Group allowing inbound permission from the Web Server Security Group
Database Tier
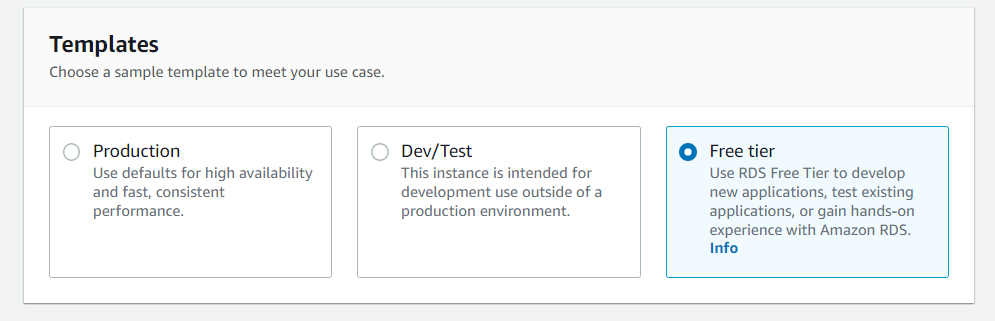
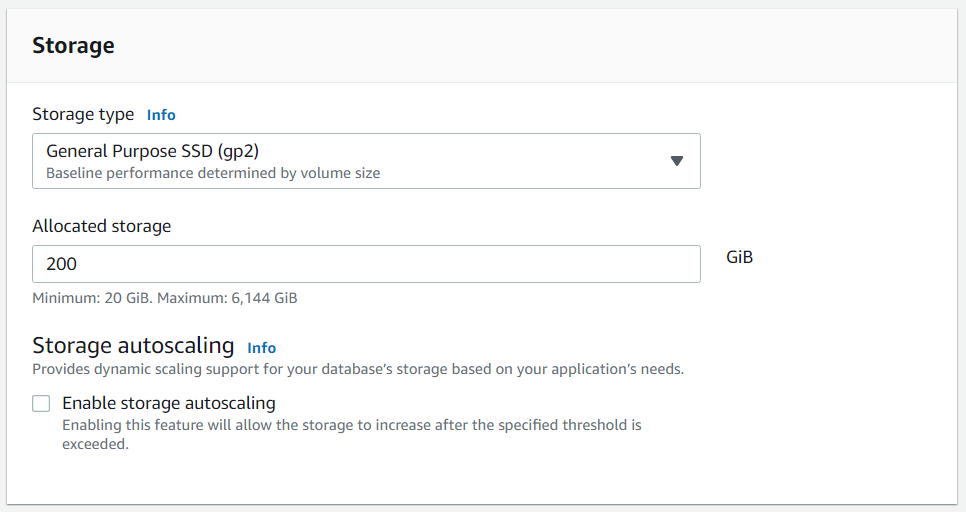
- Use a free Tier MySQL RDS Database
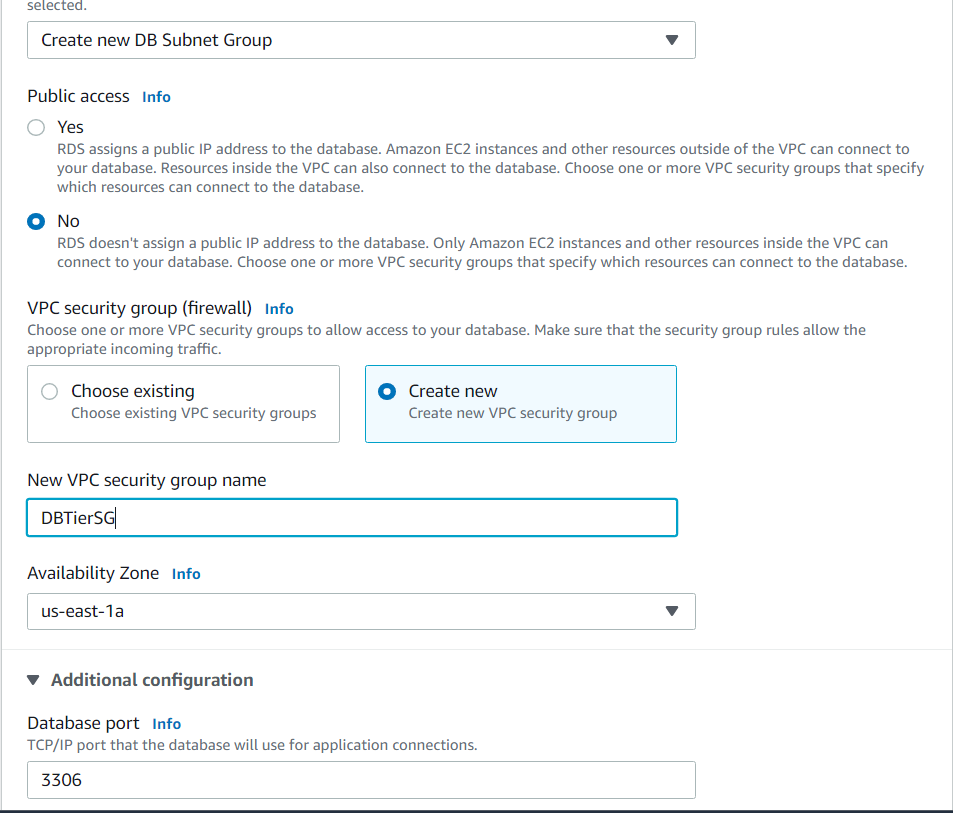
- The Database Security Group should allow inbound traffic for MySQL from the Application Server Security Group.
- Two private subnets associated with a private route table
Prerequisites:
AWS Account
Terminal
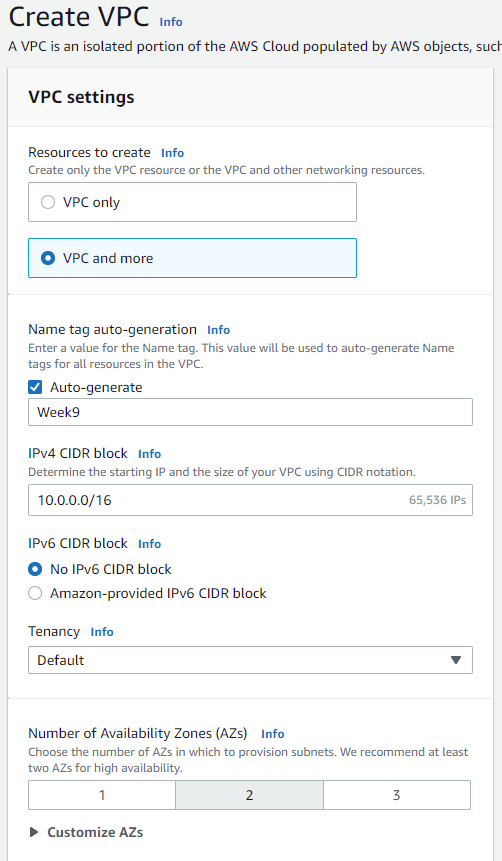
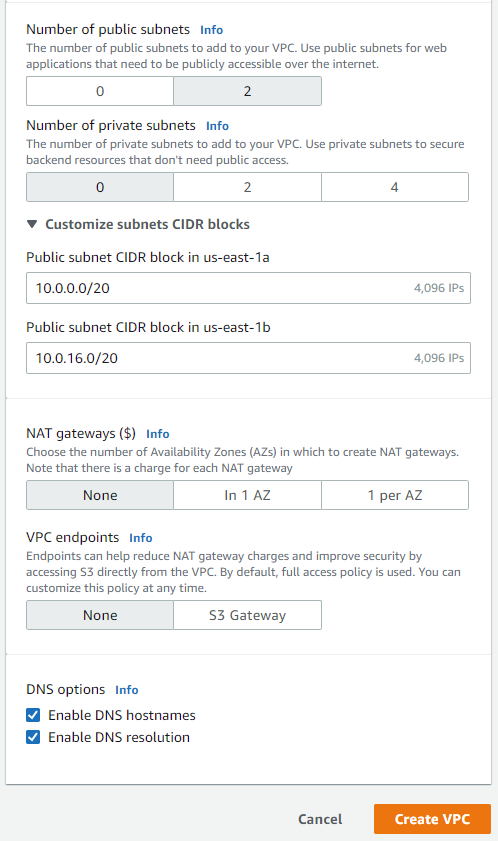
For starters, we will be creating our VPC as well as our two public subnets for our web tier. If you're wondering how I came up with the CIDRs, I just used the ones that were provided. If you want to create your own, just use a CIDR calculator. They can be found easily on Google:
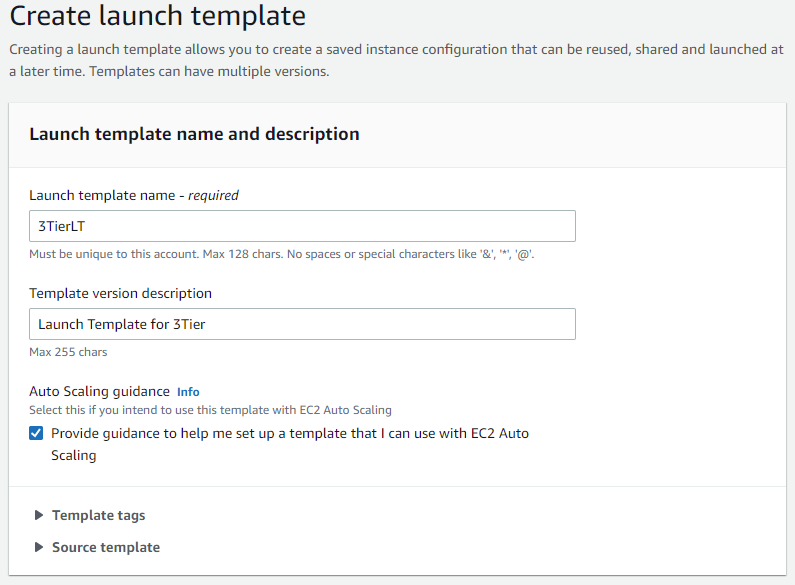
Now we will create the launch template for our web tier. Navigate to the Launch Template pane in the EC2 service:
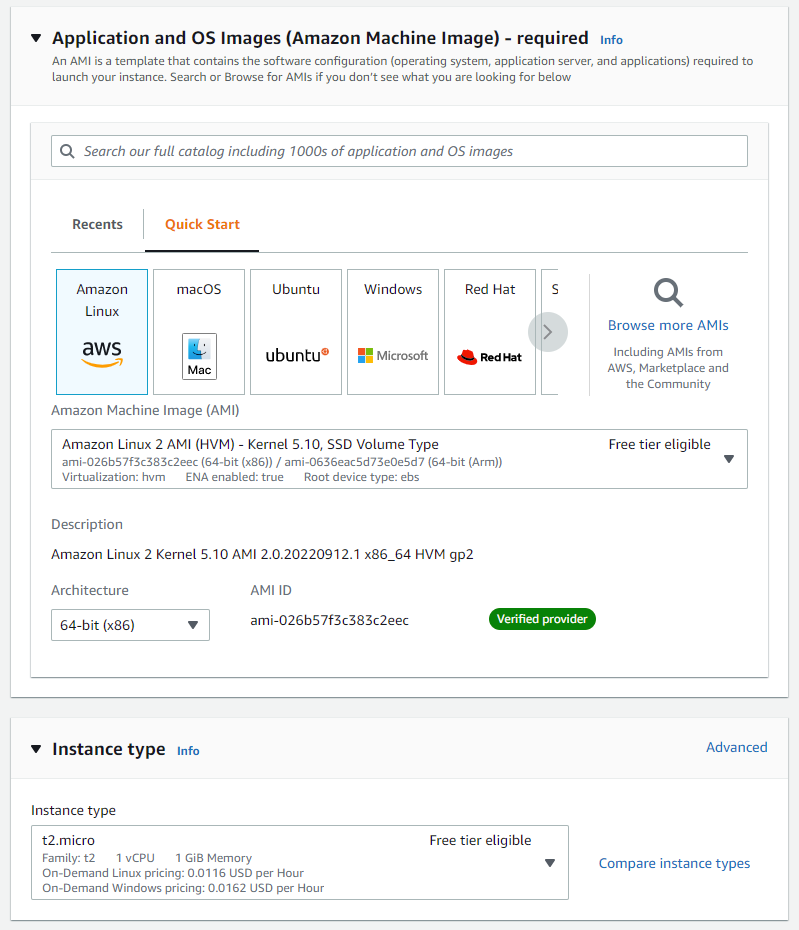
Create or use an existing key pair. For the network settings, create a new security group and select the VPC you just created:

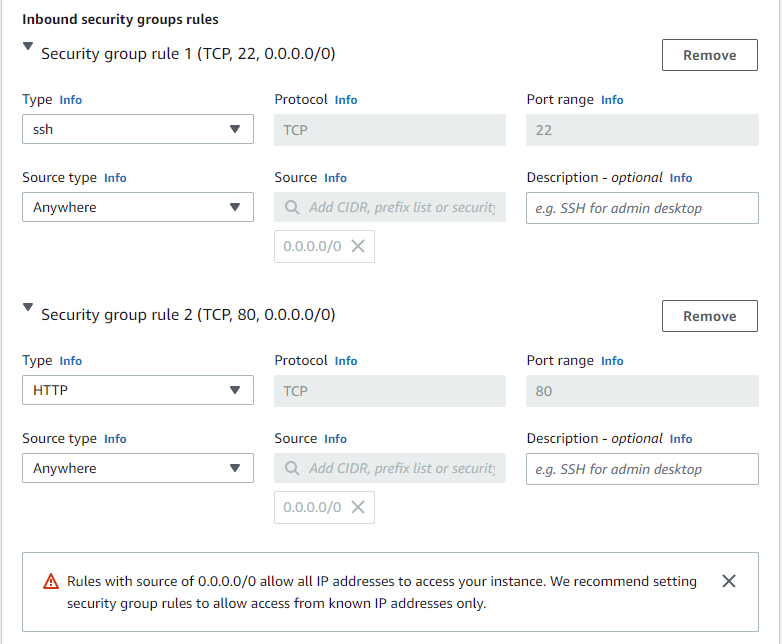
For the security group rules, set the SSH and HTTP source type to anywhere:
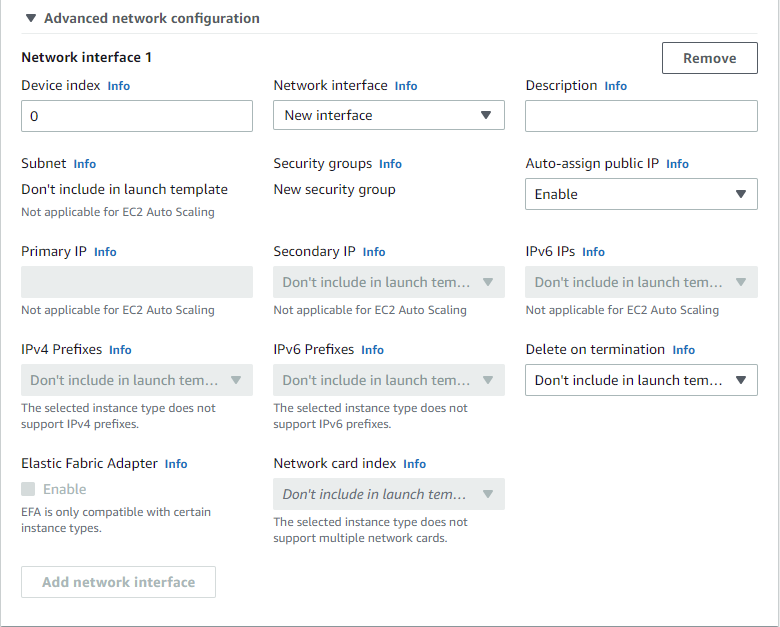
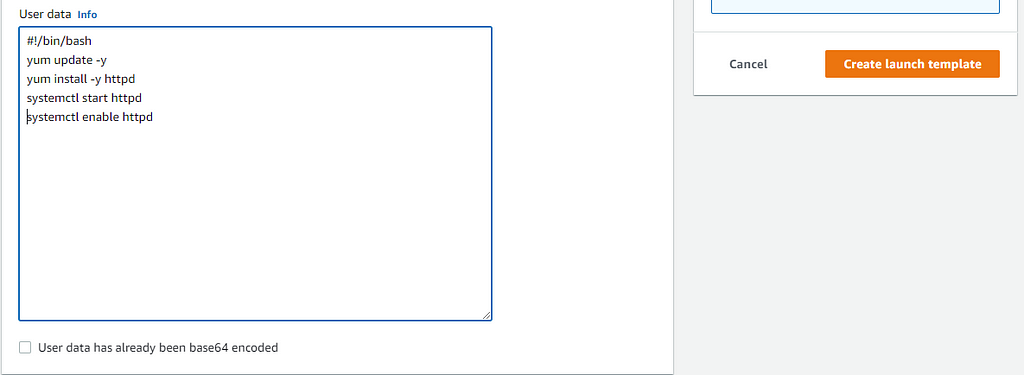
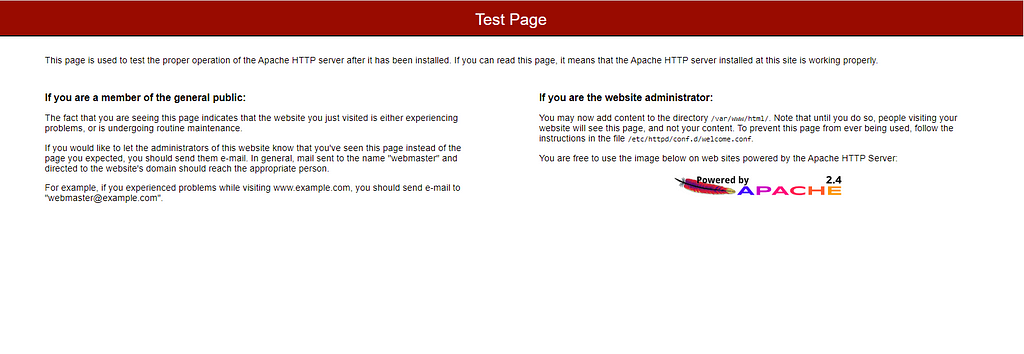
We will be using an Apache web server that was created from a BASH script as our user data. In the Advanced Details section, input the following script, then create your template:
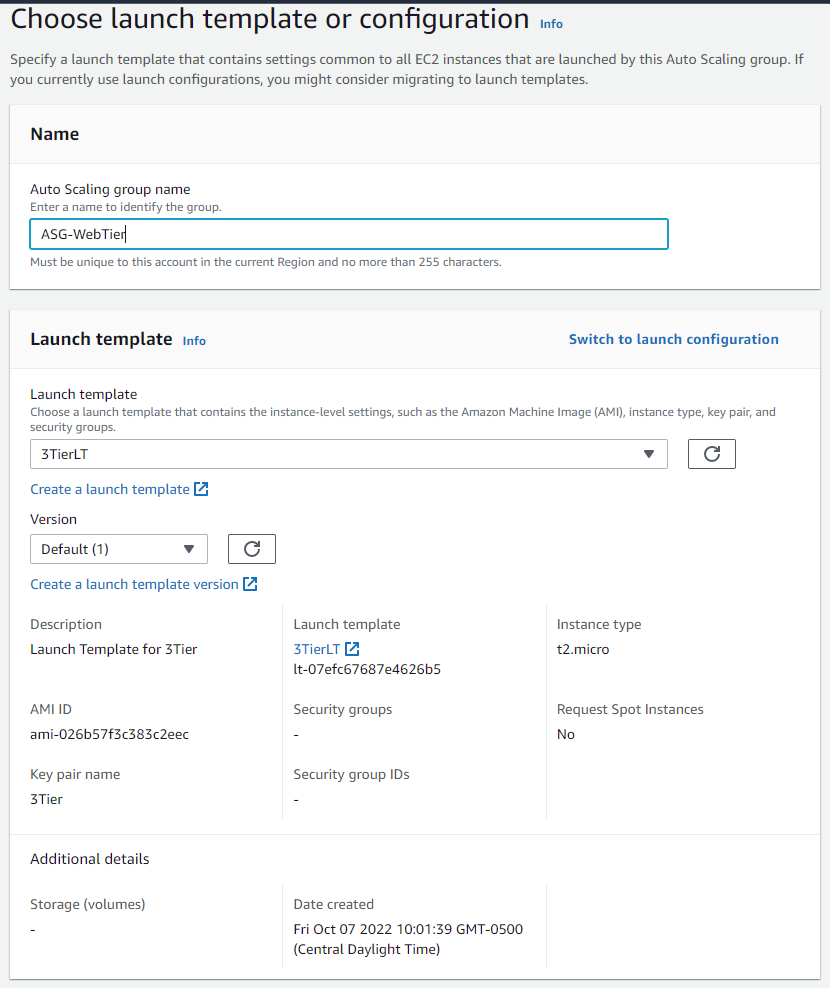
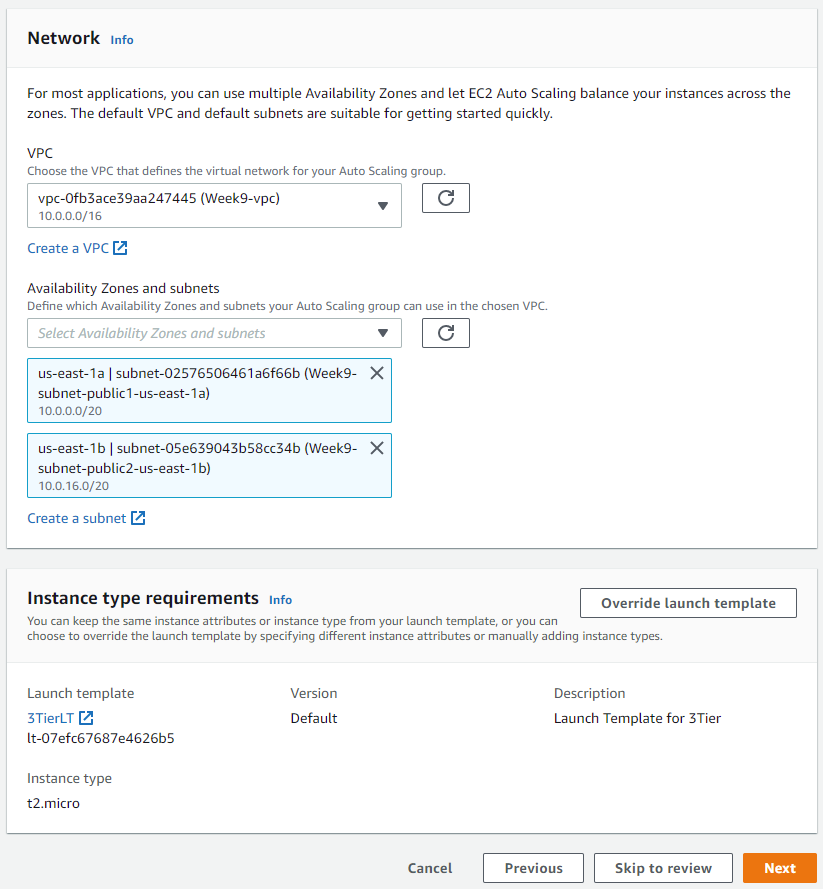
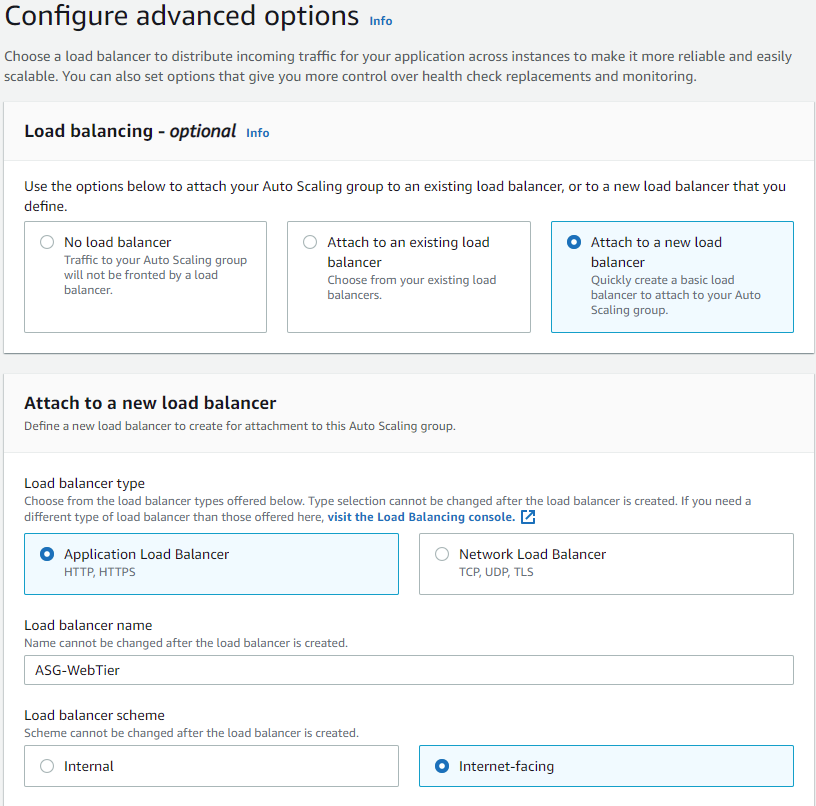
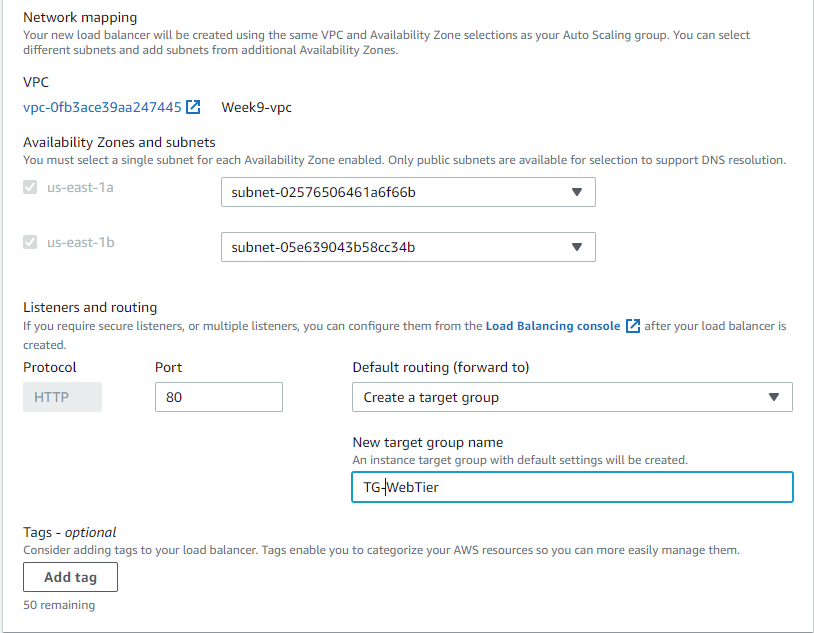
Now we will create the auto-scaling group for our web tier:

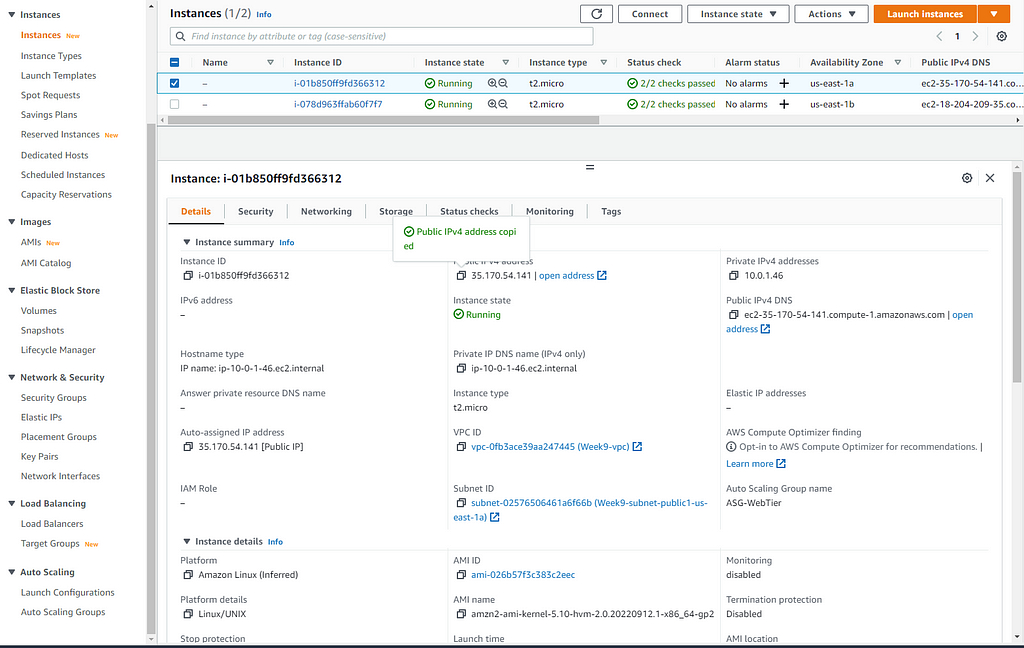
After your auto-scaling gr oup has been created, let's head over to our Instances pane and select an IP address to copy and paste in our web browser:
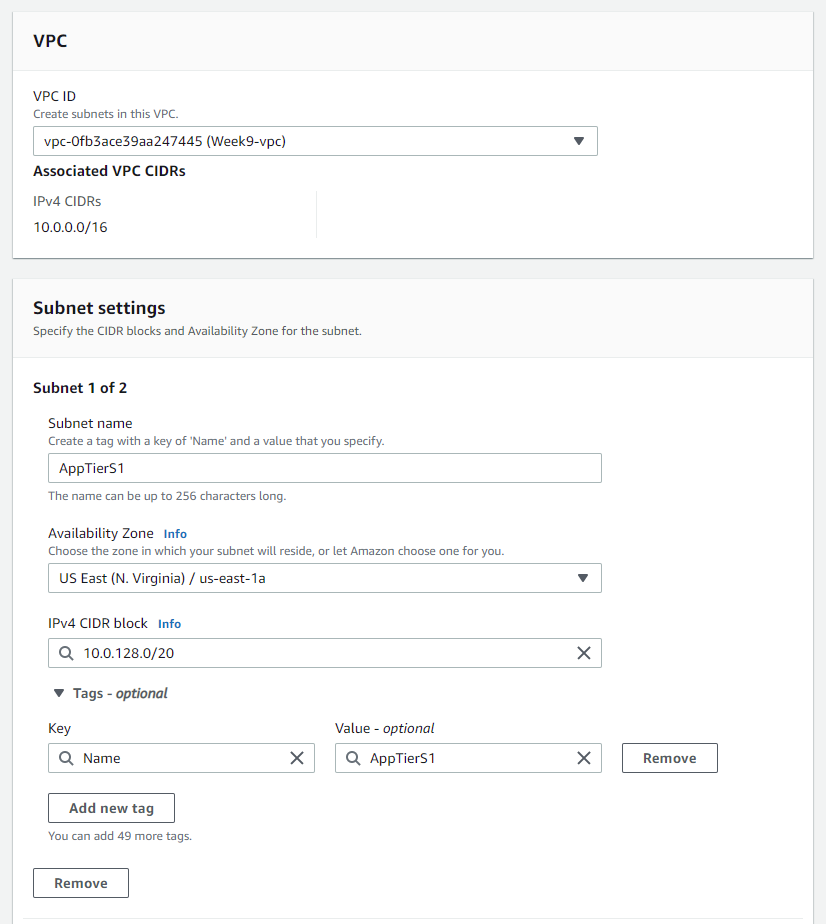
For our application tier we will be creating two subnets under the same VPC we recently created. Navigate to the Subnets pane in the VPC service and create your subnets:

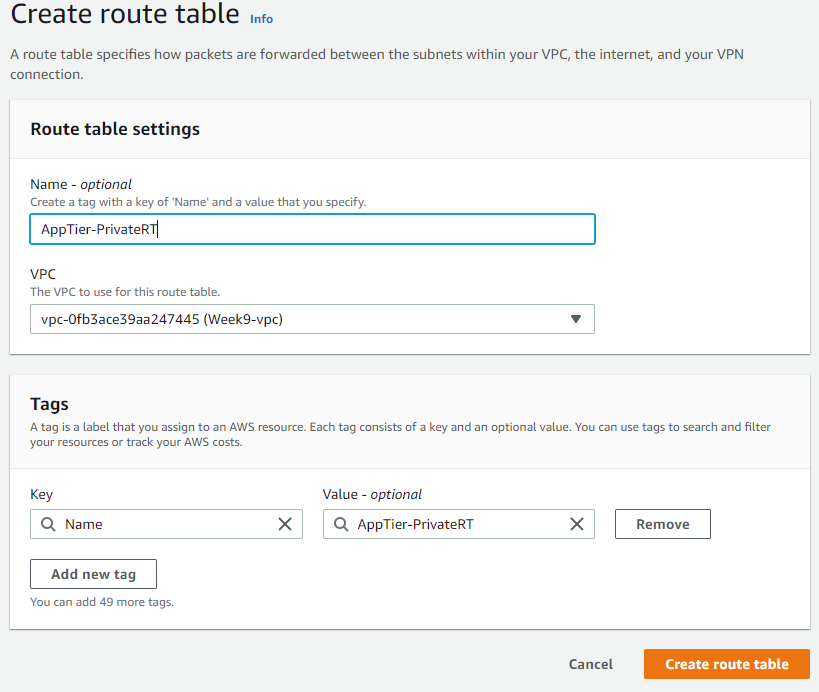
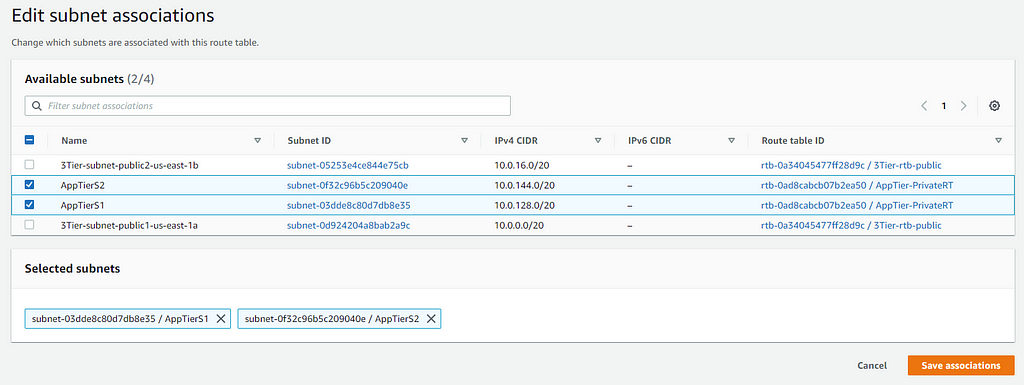
After you've created the subnets, you'll need to create a routing table and associate those subnets with it:
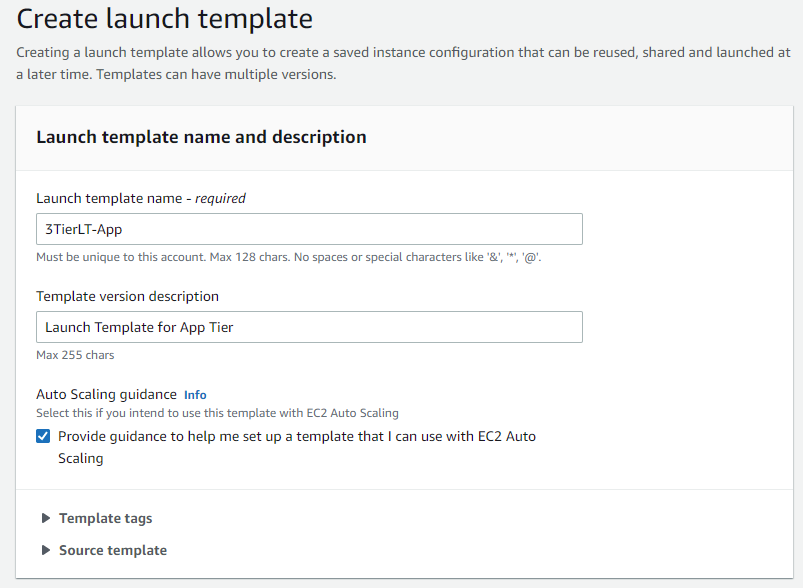
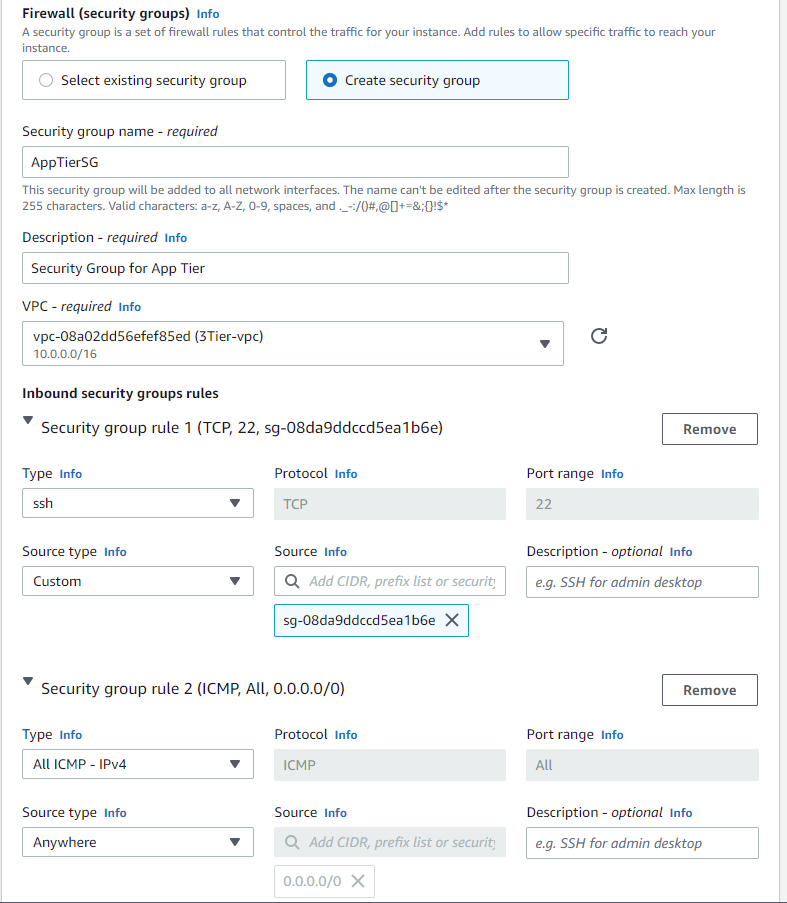
Now we will create another launch template for our application tier. This launch template will be the same as the one for our web tier, only the security group settings will be different. We want to allow inbound permissions from our web server security group in the source field:
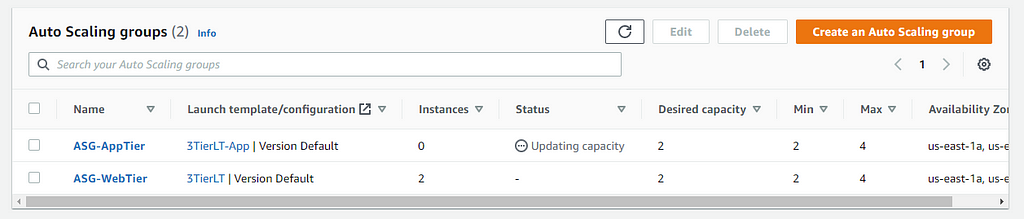
Now let us create another auto-scaling group for our application tier. Repeat the same process as before:

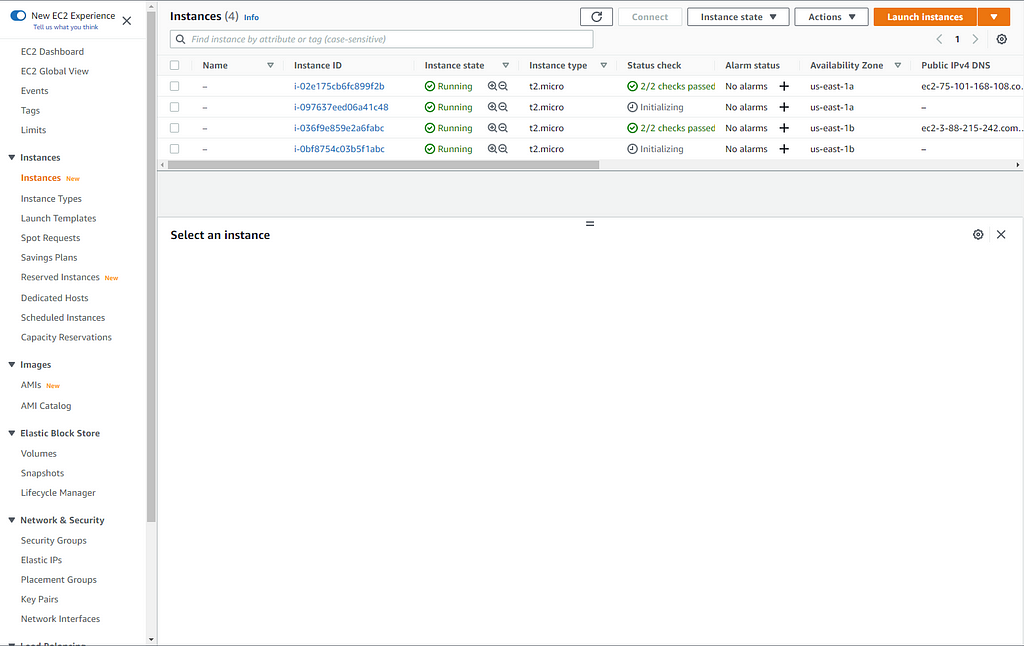
After both auto-scaling groups have been created, let's go over to the Instances pane to see how they're doing:
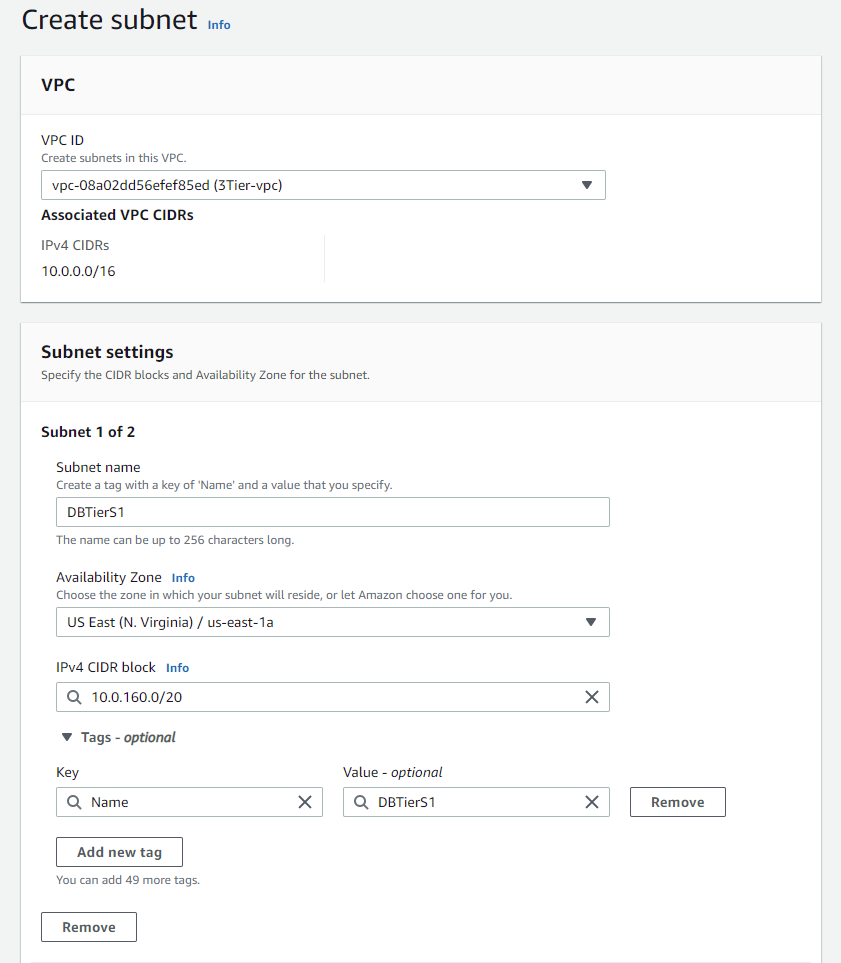
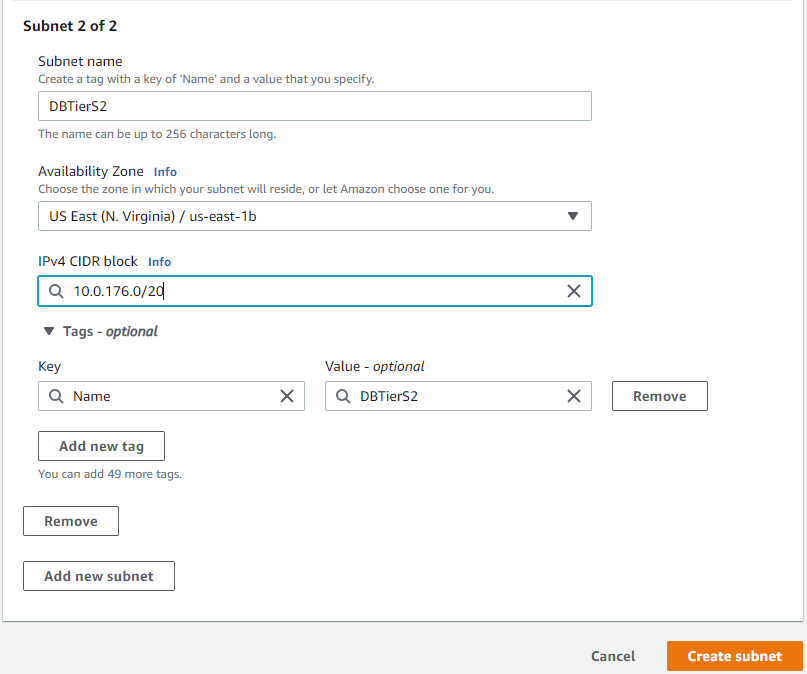
Now we will create the subnets for our database tier:
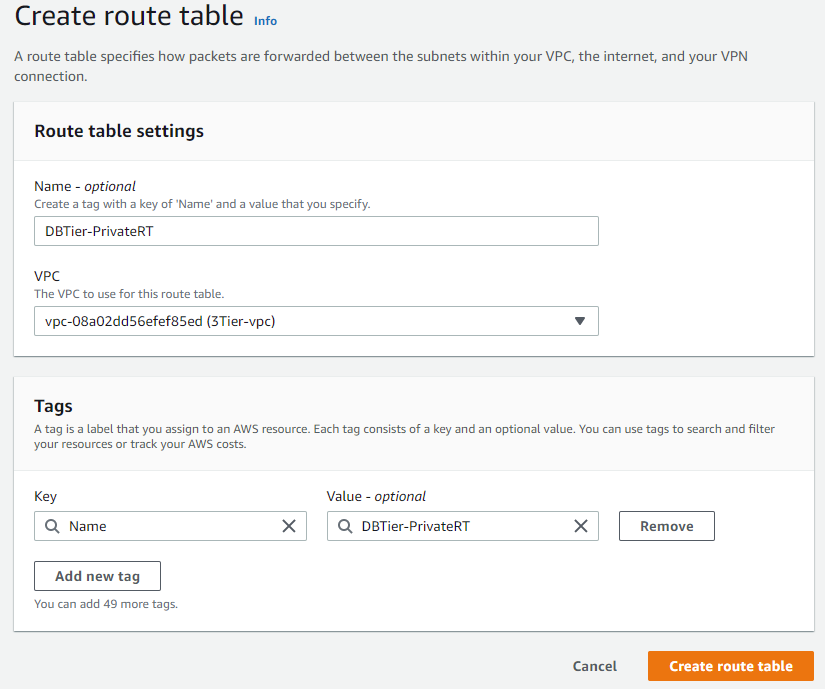
After creating the subnets, create a route table and associate the subnets with said route table:

We now have one public route table and two private route tables with the correct associations:

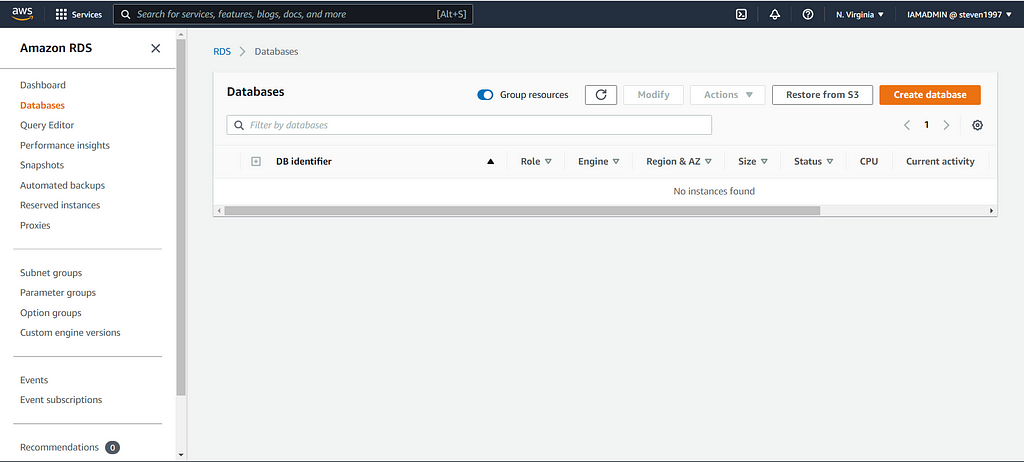
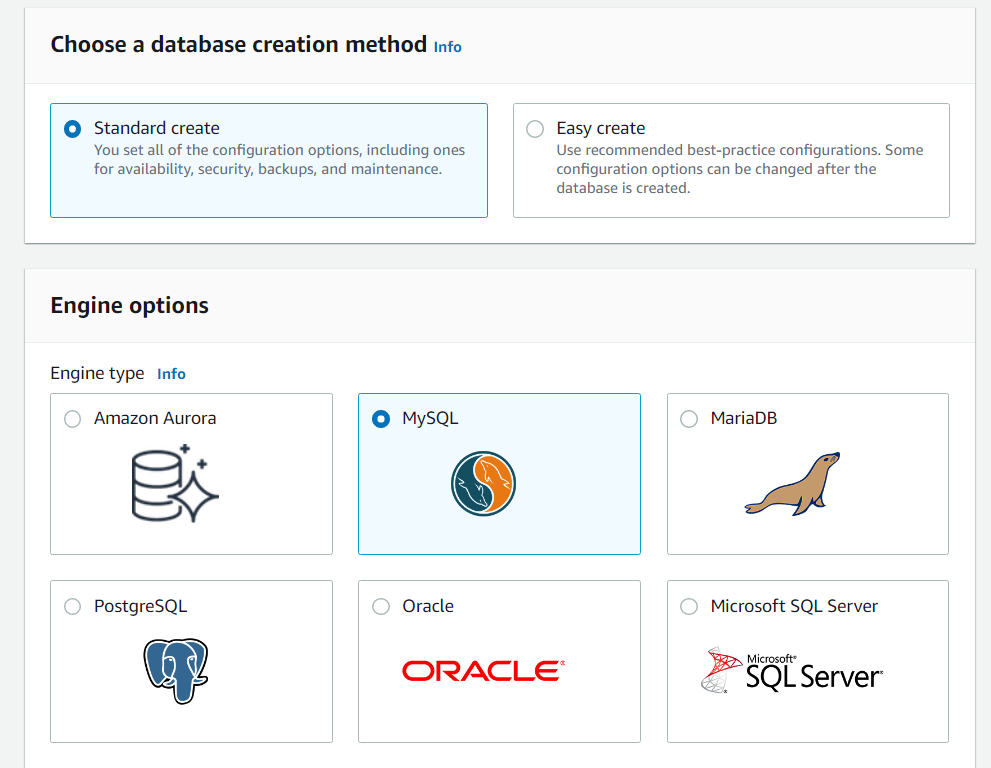
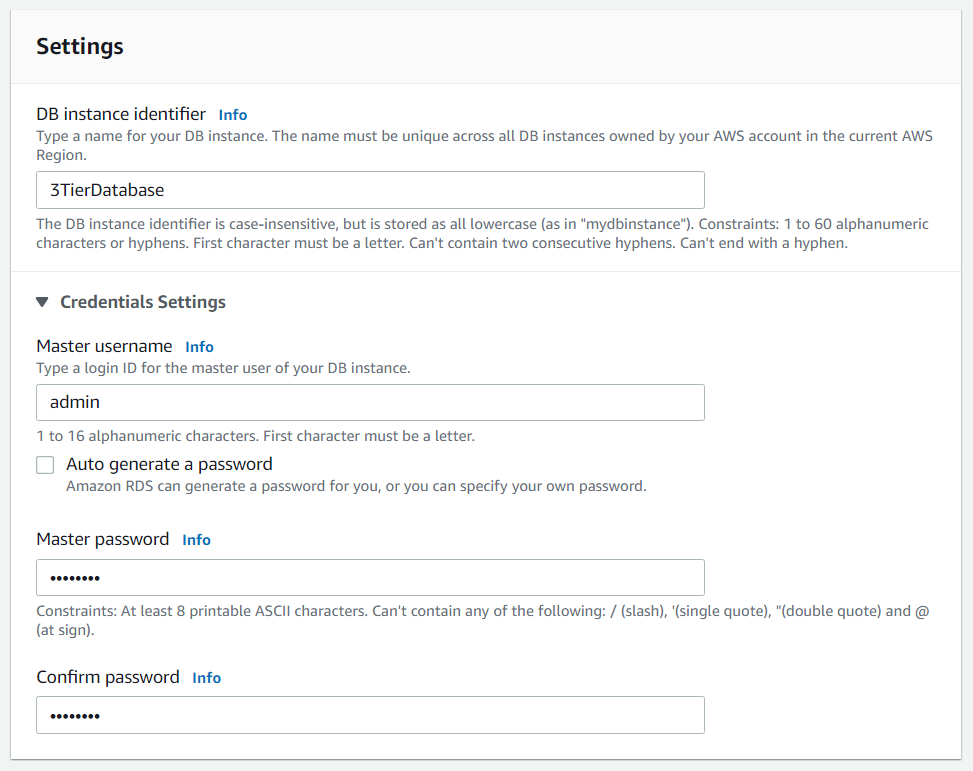
Let's now head over to the RDS service and set up our database tier. Click on databases, then click create a database and follow the images below for correct setup:


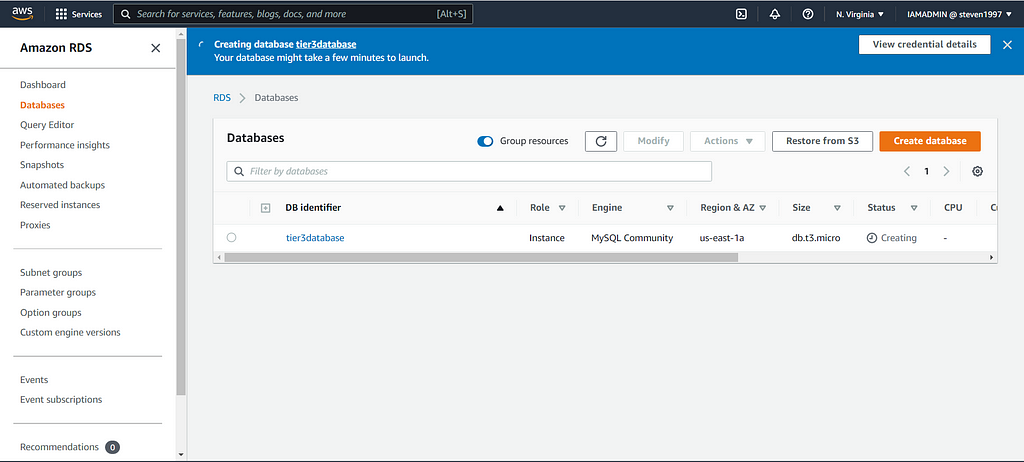
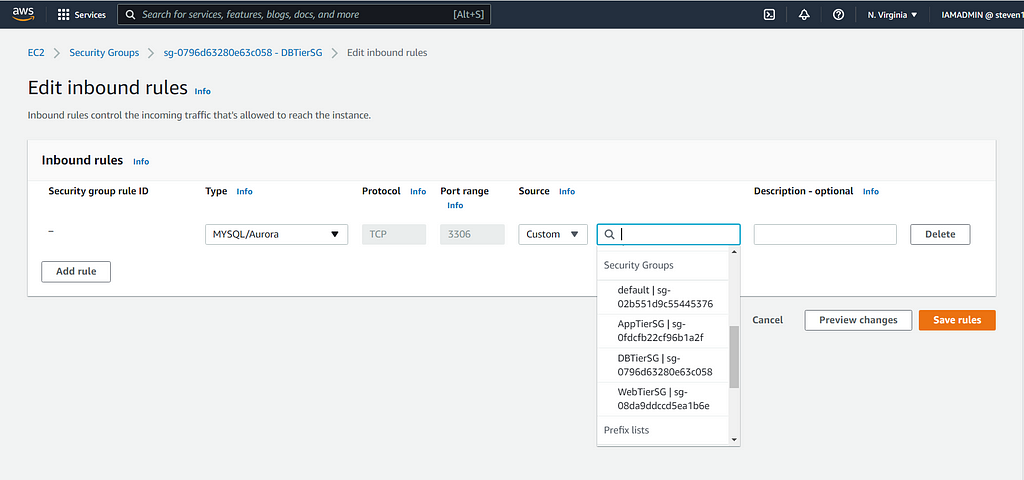
After your database has been created, head over to actions and inbound rules. We want to allow inbound traffic to MYSQL from our application tier security group:

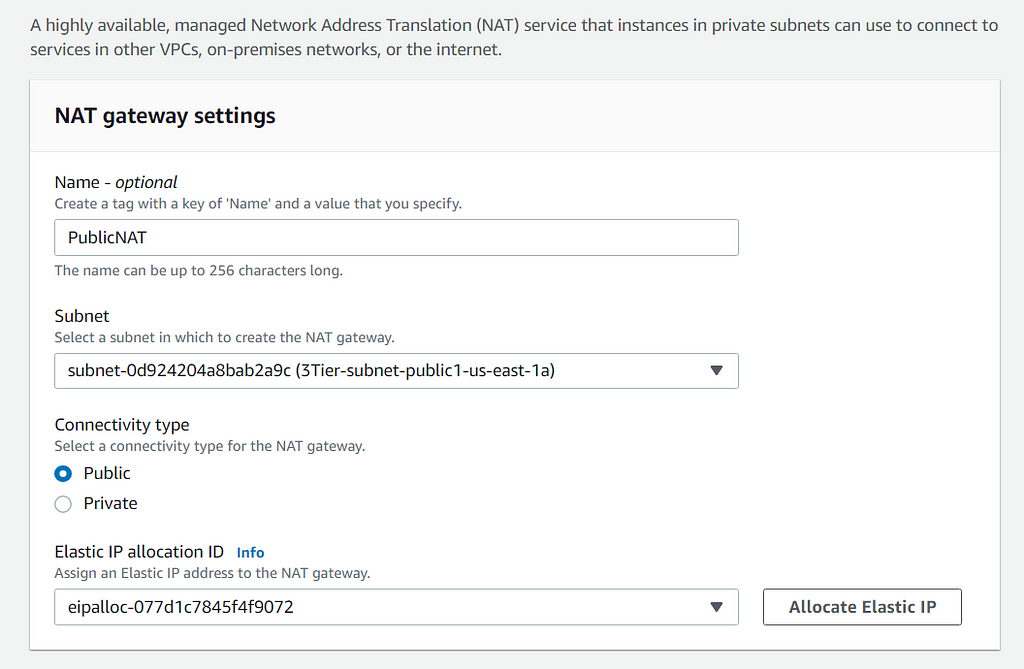
Now that all three tiers have been created, we want to create a NAT gateway to route all traffic from the private route table. Choose a subnet in which to create the gateway, and make the connectivity type public. Also allocate an elastic IP for the NAT:
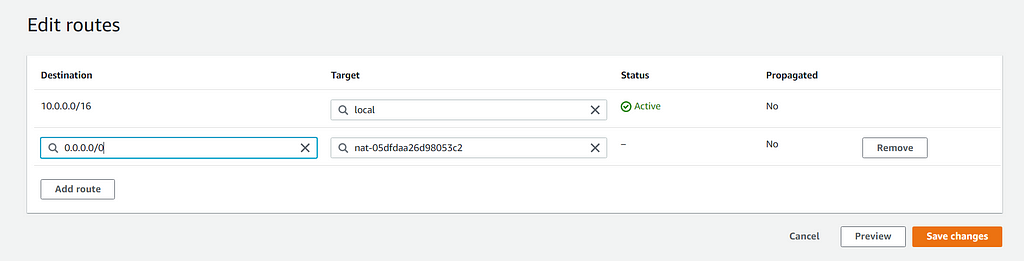
Now you want to go to your private route tables, being the Application tier and Database tier, and route the traffic to the NAT gateway. Go to Edit Routes and input the following for both:
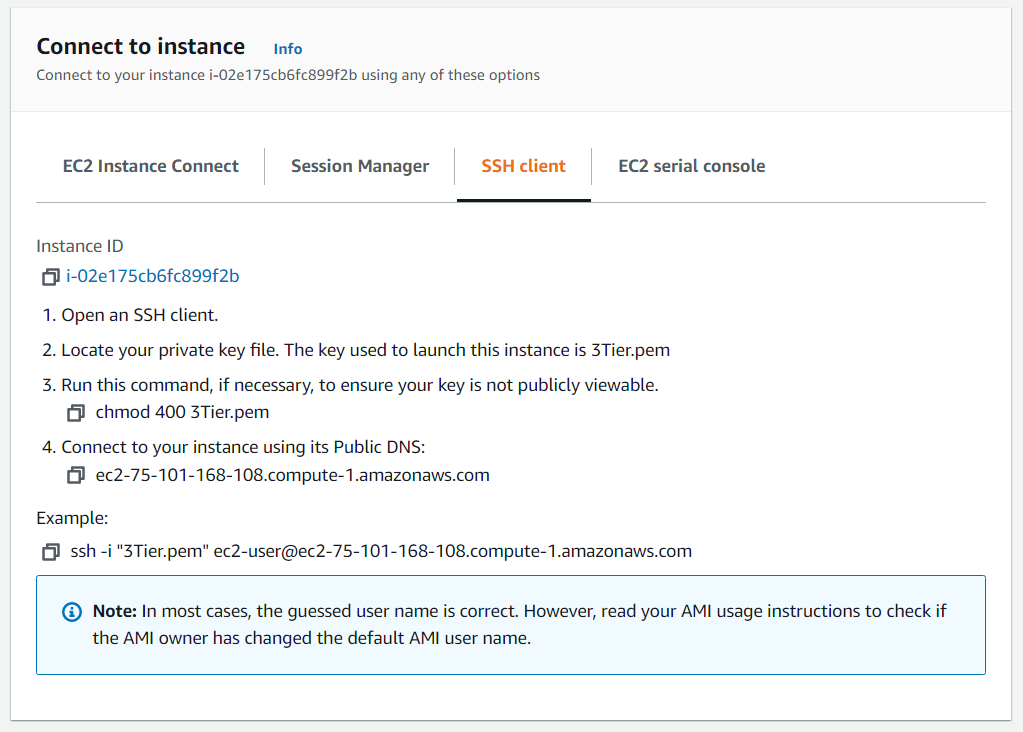
And with that you have just created your 3-tier architecture in AWS! Now for our last step, let's see if we can ping our application tier from our web tier. Pick any public EC2 instance and SSH into it through your terminal:
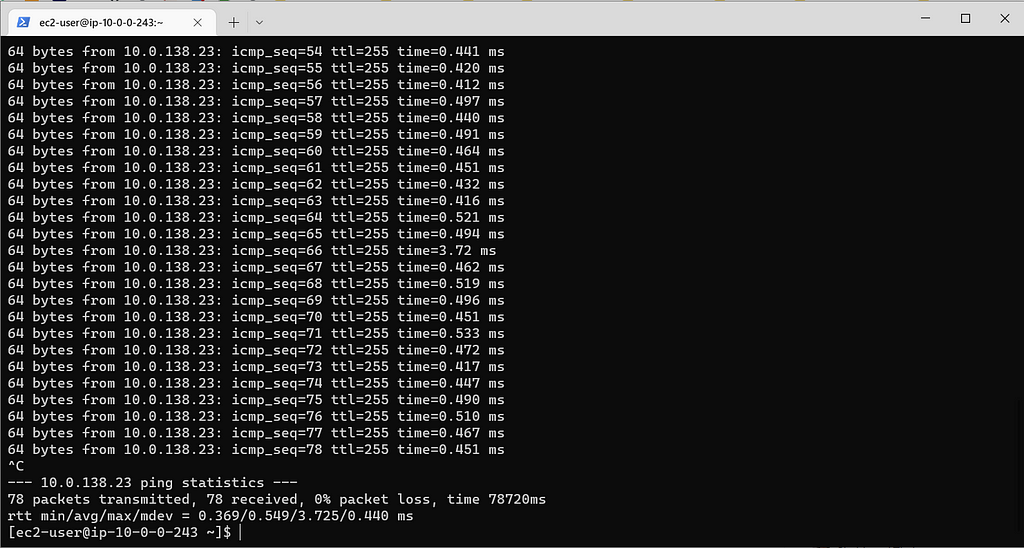
Now you want to run the ping command for a private IP in one of your public instances :
ping <private IP of application tier instance>
Roadblocks:
I ran into some problems with my security groups while creating the launch template for the application tier. I was trying to create a launch configuration within the auto-scaling group and that messed with everything. This one problem caused me to have to delete everything twice and start over because I couldn't figure out what the problem was. I decided to just create another launch template, and that worked fine . Will have to look into it more, but I believe launch configurations are obsolete.
Thank you to all who took the time to read! Feedback is much appreciated!
Designing 3-Tier Architecture in AWS was originally published in Towards AWS on Medium, where people are continuing the conversation by highlighting and responding to this story.
Comments
Post a Comment