Deploy a Custom Docker Image And Save The Container Data in AWS ECR
Welcome!
Today we're going to be creating a custom Docker image that outputs the date the container was deployed.
Must-Haves:
- AWS account with the proper permissions
- If you're doing this project in cloud9 like me you'll want to add an inbound rule to the security group that's attached to your environment. "All Traffic", from "My IP"
Step 1: Create your directory and file(s)
Create a directory specifically for this tutorial and change into that directory. Inside of it create an "index.html" file and a "Dockerfile" file. Make sure to capitalize the D in "DockerFile" so that Docker will recognize it.

Other than my typo we're looking perfect so far!
Step 2: Pull the Nginx image
From your CLI, run "docker pull nginx" or "docker pull nginx:latest".

Step 3: Building the container
Before we build this container we have to jump into our "Dockerfile" and add a script to open it up on port 8080.

Then we'll hop into our index.html file and add our main script.

Using the command "docker build -t <your image name> ." start your build. Do not forget to put the "." at the end of your command to ensure that it is built in your CWD. The "-t" is for tagging our image so we don't lose track of it.

Now we can run a "docker run -d — name <your container name> -p 8080:80 n ginx".

The -d is used to run the container in the background and print the container id.
-p Is used to publish the container's port(s) to the host.
Step 4: Validation
To ensure our image is up and running, let's head over to the ec2 dashboard and select the instance running our cloud9 environment. Copy the public IP into your browser adding ":8080" after.

Boom! Up and running. Let's also run a "docker ps -a" from our command line to make sure everything looks good.

Step 5: Save the data to ECR
From the AWS ECR dashboard let's choose to create a new repository.

Give your repo a name and leave the rest of the settings as default. After creating your repo, select it and click "View push commands".

Run command #1 to login. Since we've already created the image we don't need to run command #2. For command 3 we'll change the name that we made within the AWS console and replace it with our image ID.

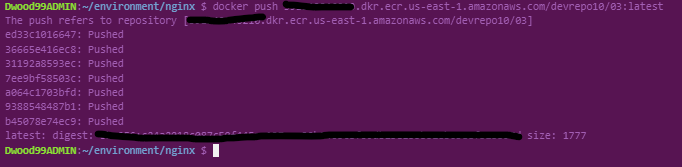
Then we'll just run command #4. (Push)
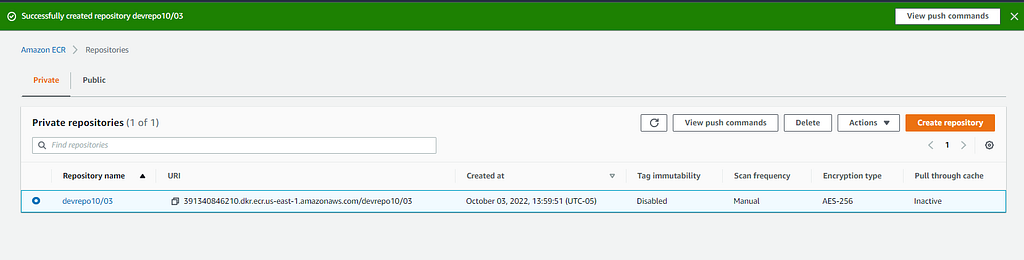
Let's go back to the ECR dashboard let's check our repo to see if our image was succe ssfully pushed.

Nice! If done correctly you should see our new image in our ECR repo.
Step 6: Clean-up
To remove our containers we'll run "docker rm -f $(docker ps -a -q)". And to remove the image(s) we'll run docker rmi -f $(docker images -a -q). Then just delete your ECR repo and we're all good to go!
I hope this article helps you along your cyber journey! :D
Best Wishes.
Deploy a Custom Docker Image And Save The Container Data in AWS ECR was originally published in Towards AWS on Medium, where people are continuing the conversation by hi ghlighting and responding to this story.
Comments
Post a Comment